

Home Assistant Integration
Connect your myCistern device to Home Assistant
Introduction
This guide walks you through connecting your myCistern device to Home Assistant.
myCistern is built on the intelliThings IoT platform. The Home Assistant connection is therefore provided through the intelliThings integration.
After setup, your myCistern device appears in Home Assistant with its entities, sensors, and controls available for dashboards and automations.
Prerequisites
Before you begin, make sure you have:
- A working Home Assistant installation
- HACS installed and configured
- Access to the relevant myCistern device
- Access to the Home Assistant instance
HACS installation is required but not covered in this tutorial. See the official HACS download documentation and the HACS basic configuration guide if you still need to set it up.
Generate Home Assistant credentials
The first step is to create credentials in myCistern that Home Assistant will use to connect to your device.
Open the Home Assistant dialog
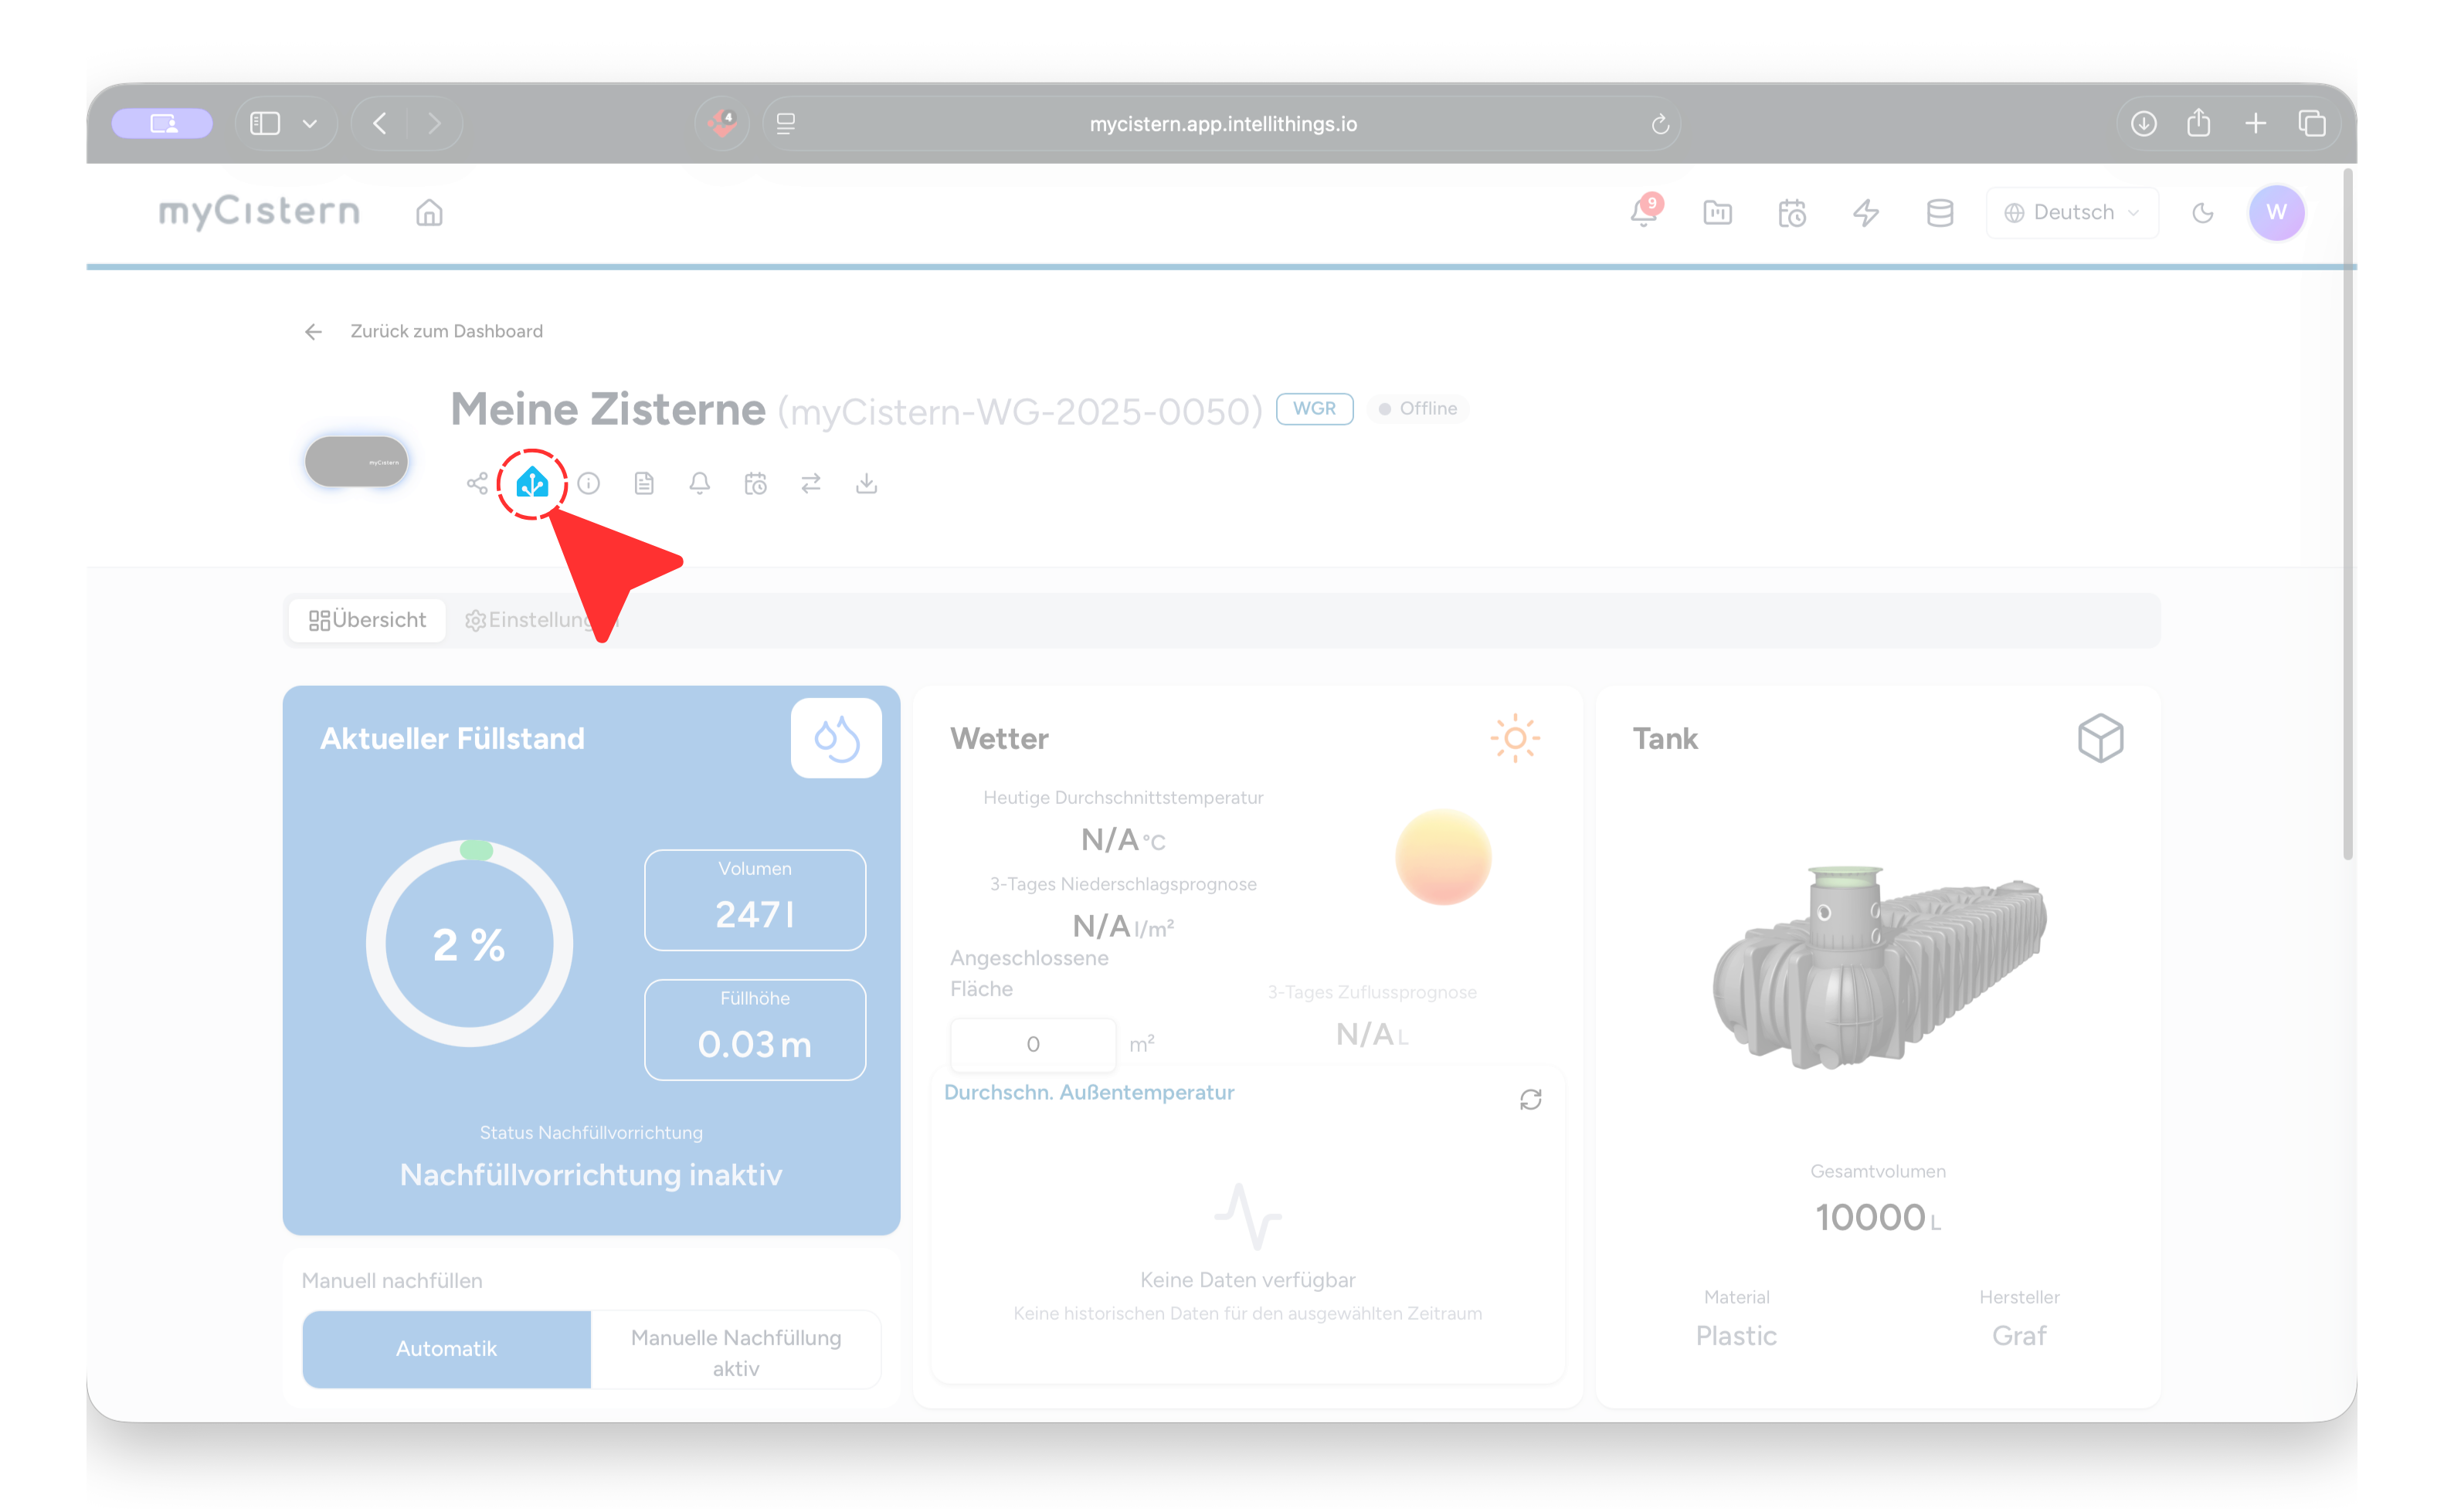
Select the Home Assistant icon in the device header. This opens the credential flow for this specific device.
Generate a token
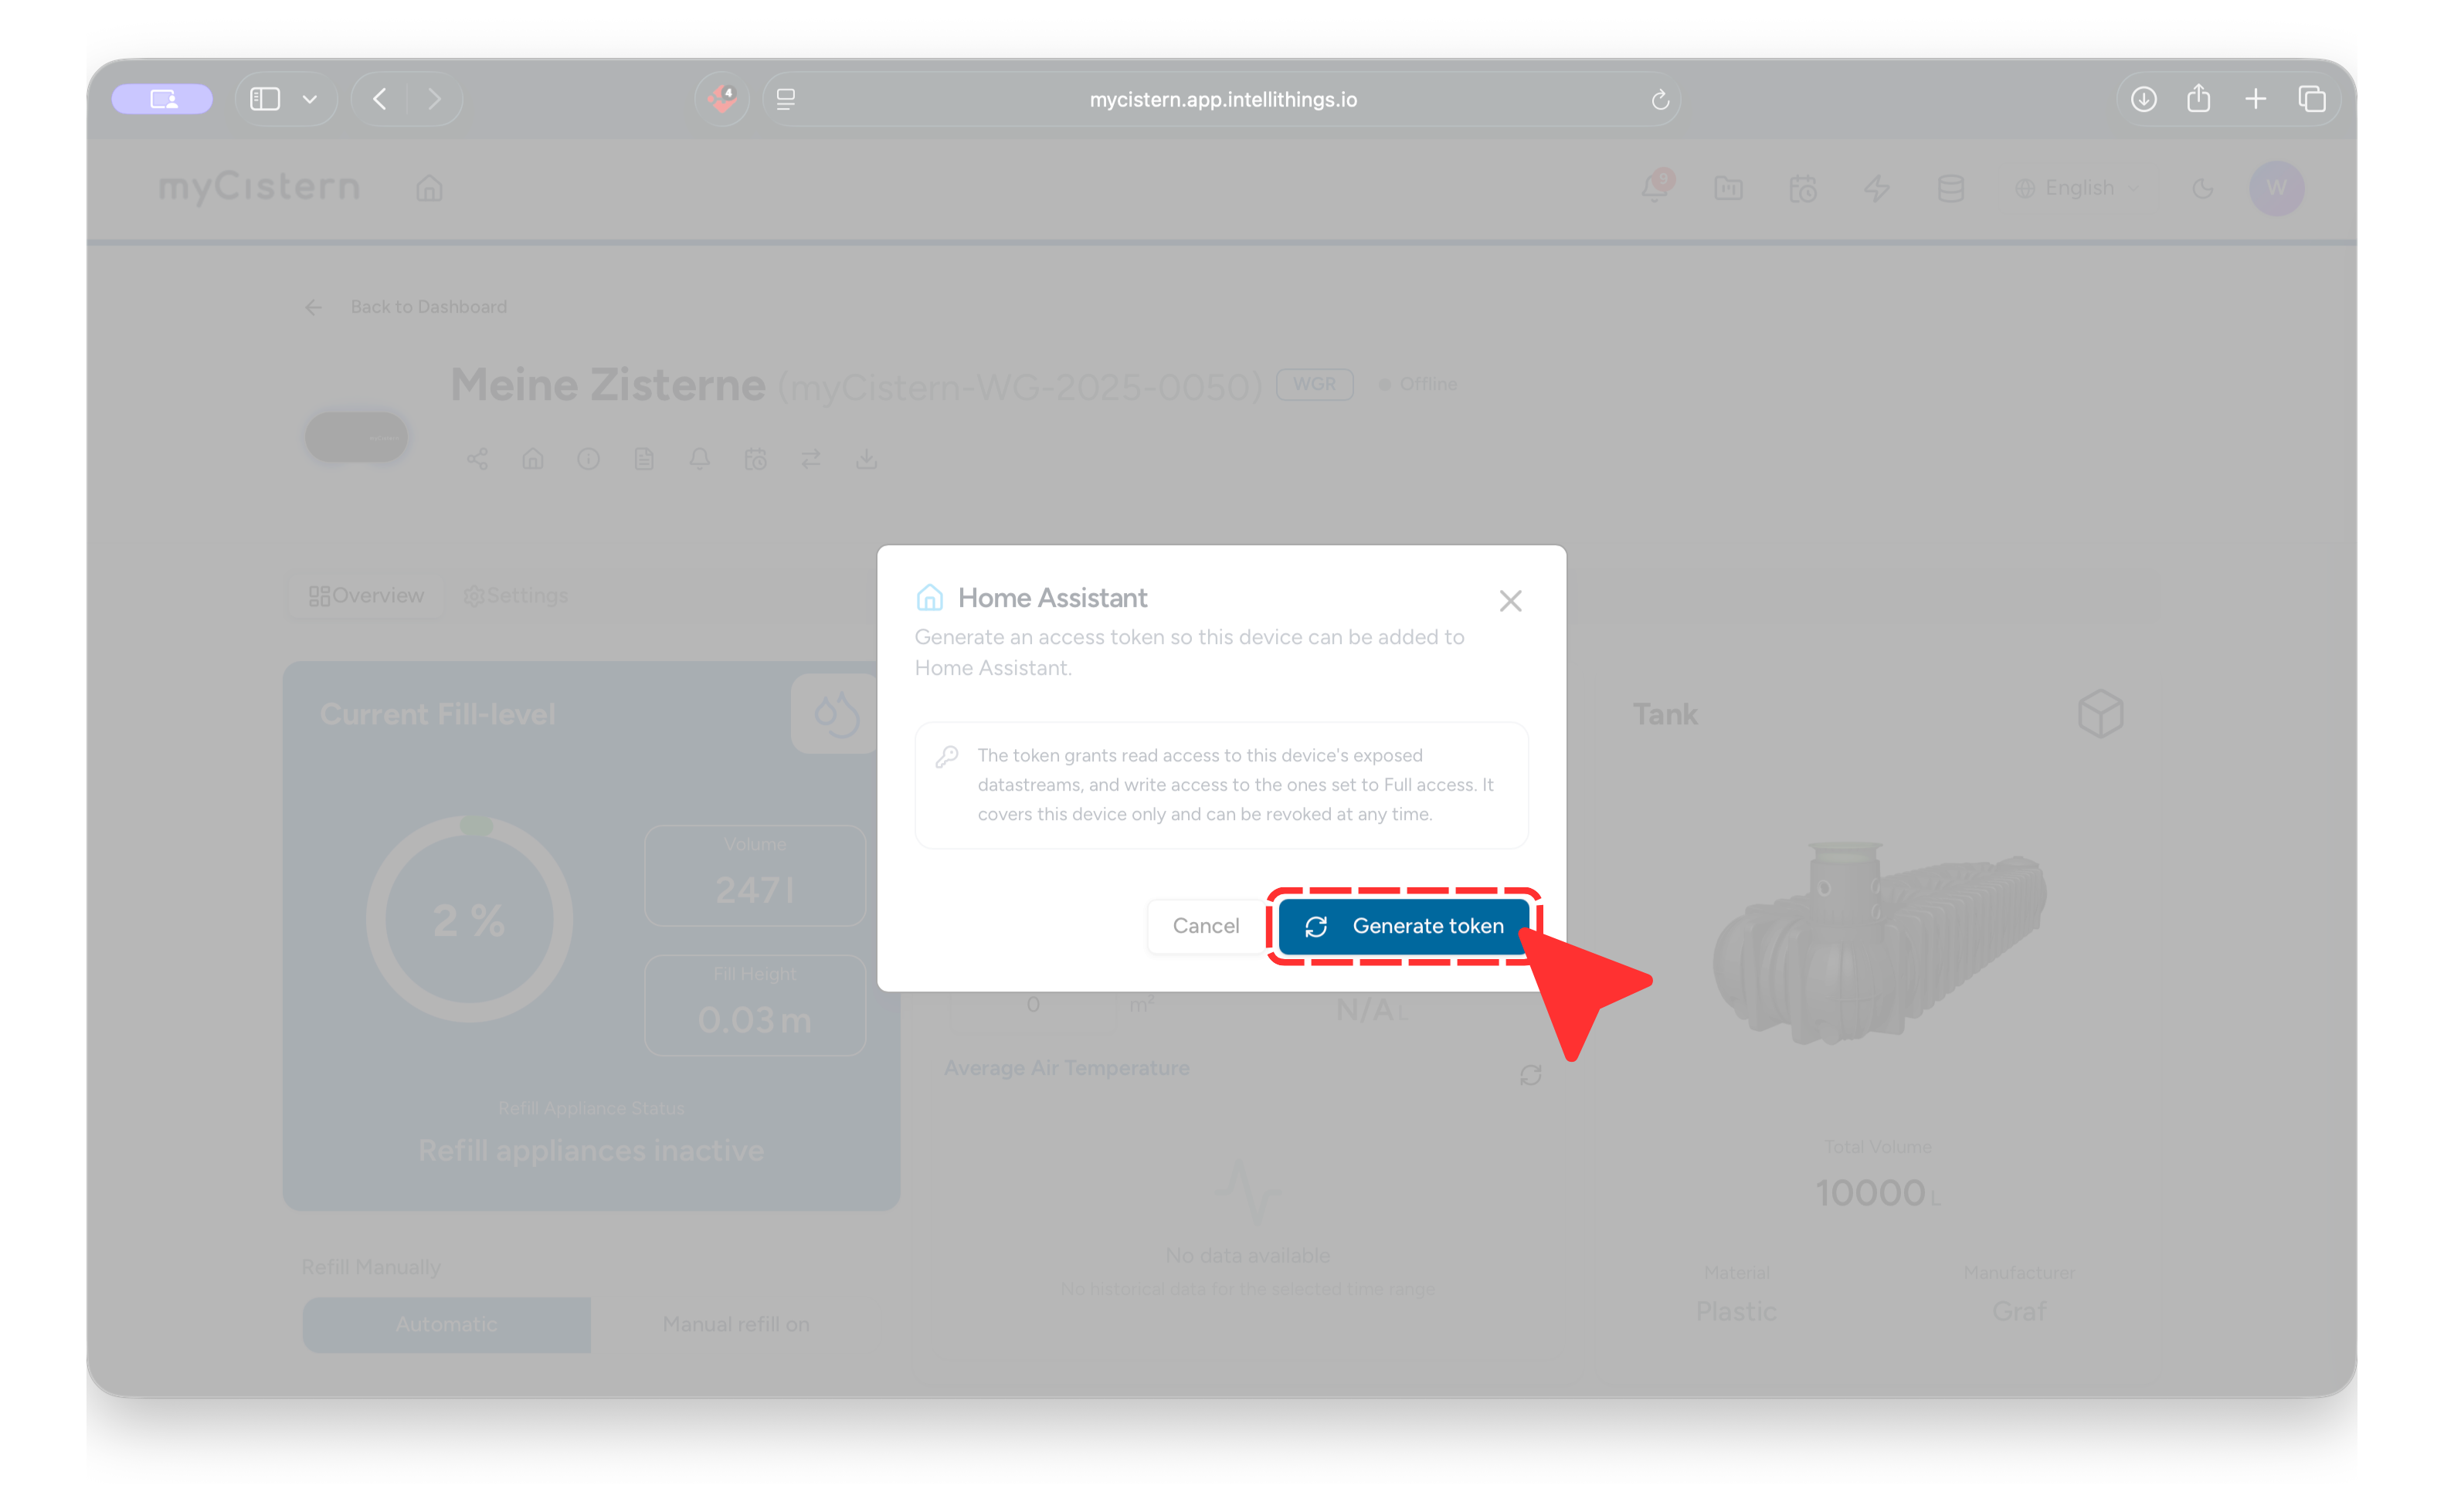
Click Generate token to create the credentials Home Assistant will use to connect to the device through intelliThings.
Copy the credentials
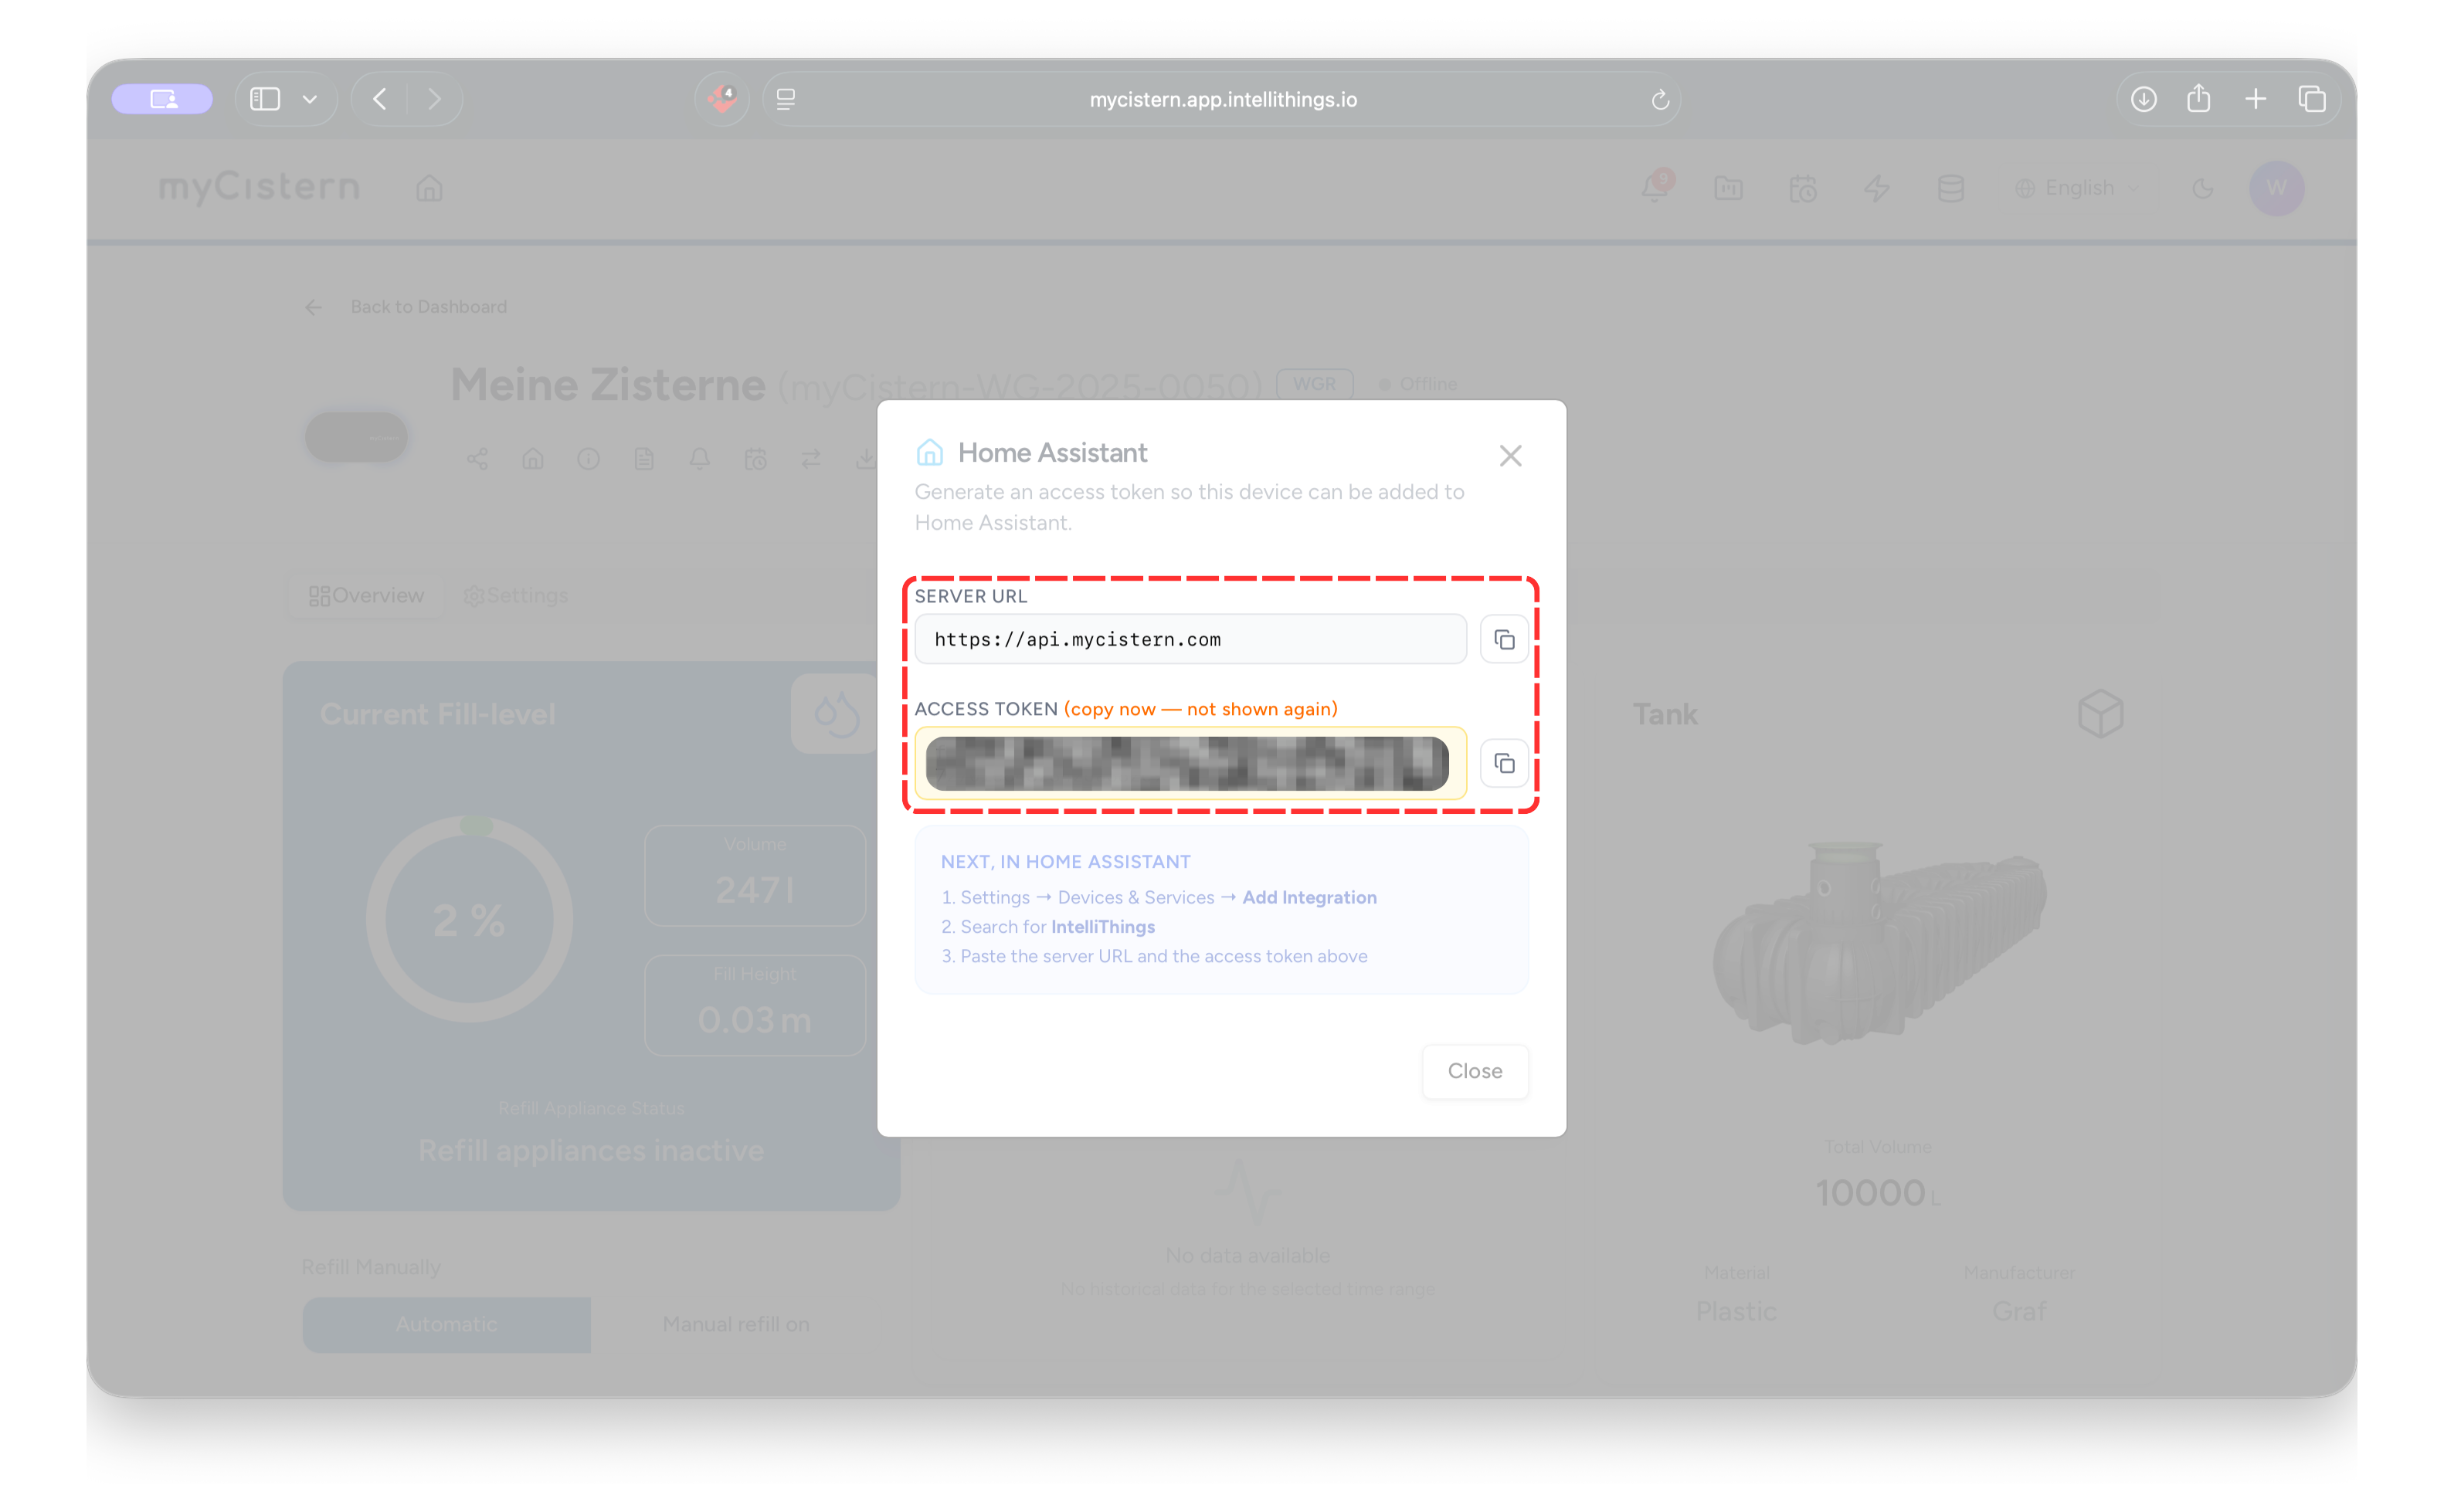
The dialog shows the server URL and an access token. Copy and keep both values for the Home Assistant setup later.
Keep your access token private
The access token authenticates Home Assistant with intelliThings and is specific to your device. Keep it private and do not share it publicly. It is shown only during setup, so copy it now. If you lose it or need to replace it, generate a new token.
The server URL is:
https://api.intellithings.ioAdd intelliThings to HACS
Next, add the intelliThings integration repository to HACS.
Open Custom repositories
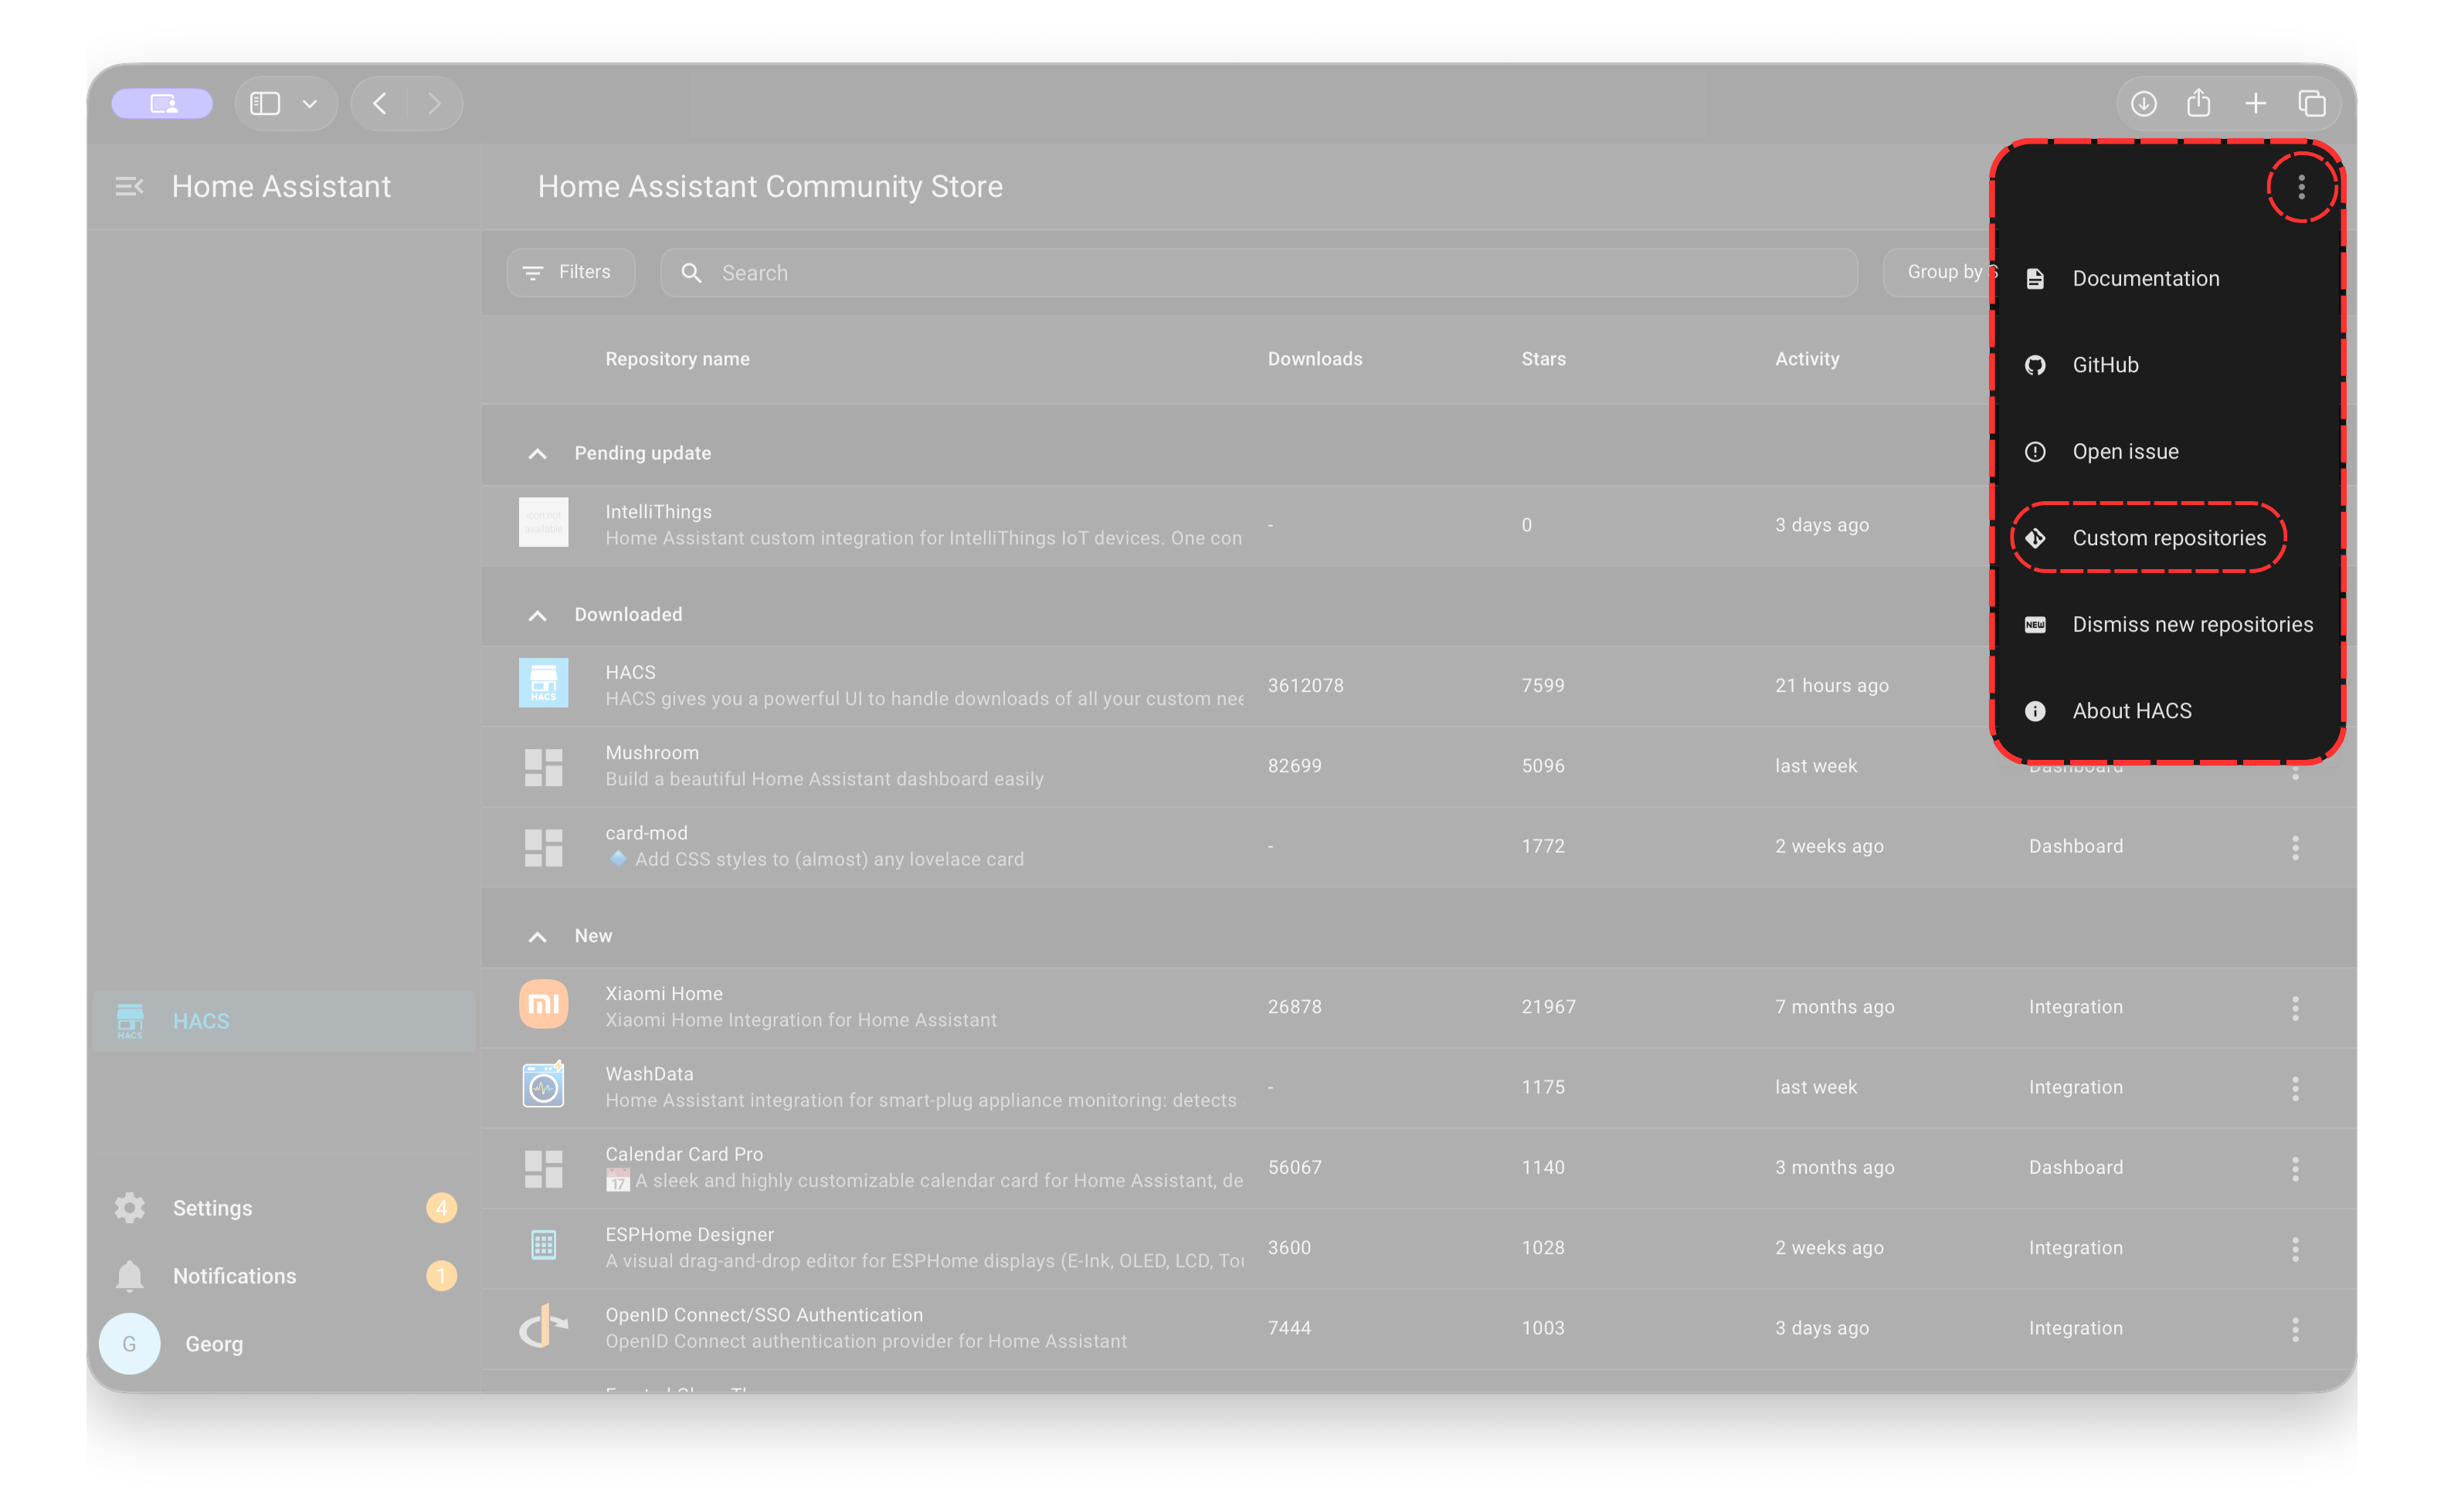
Open HACS and select Custom repositories from the three-dot menu.
Add the repository
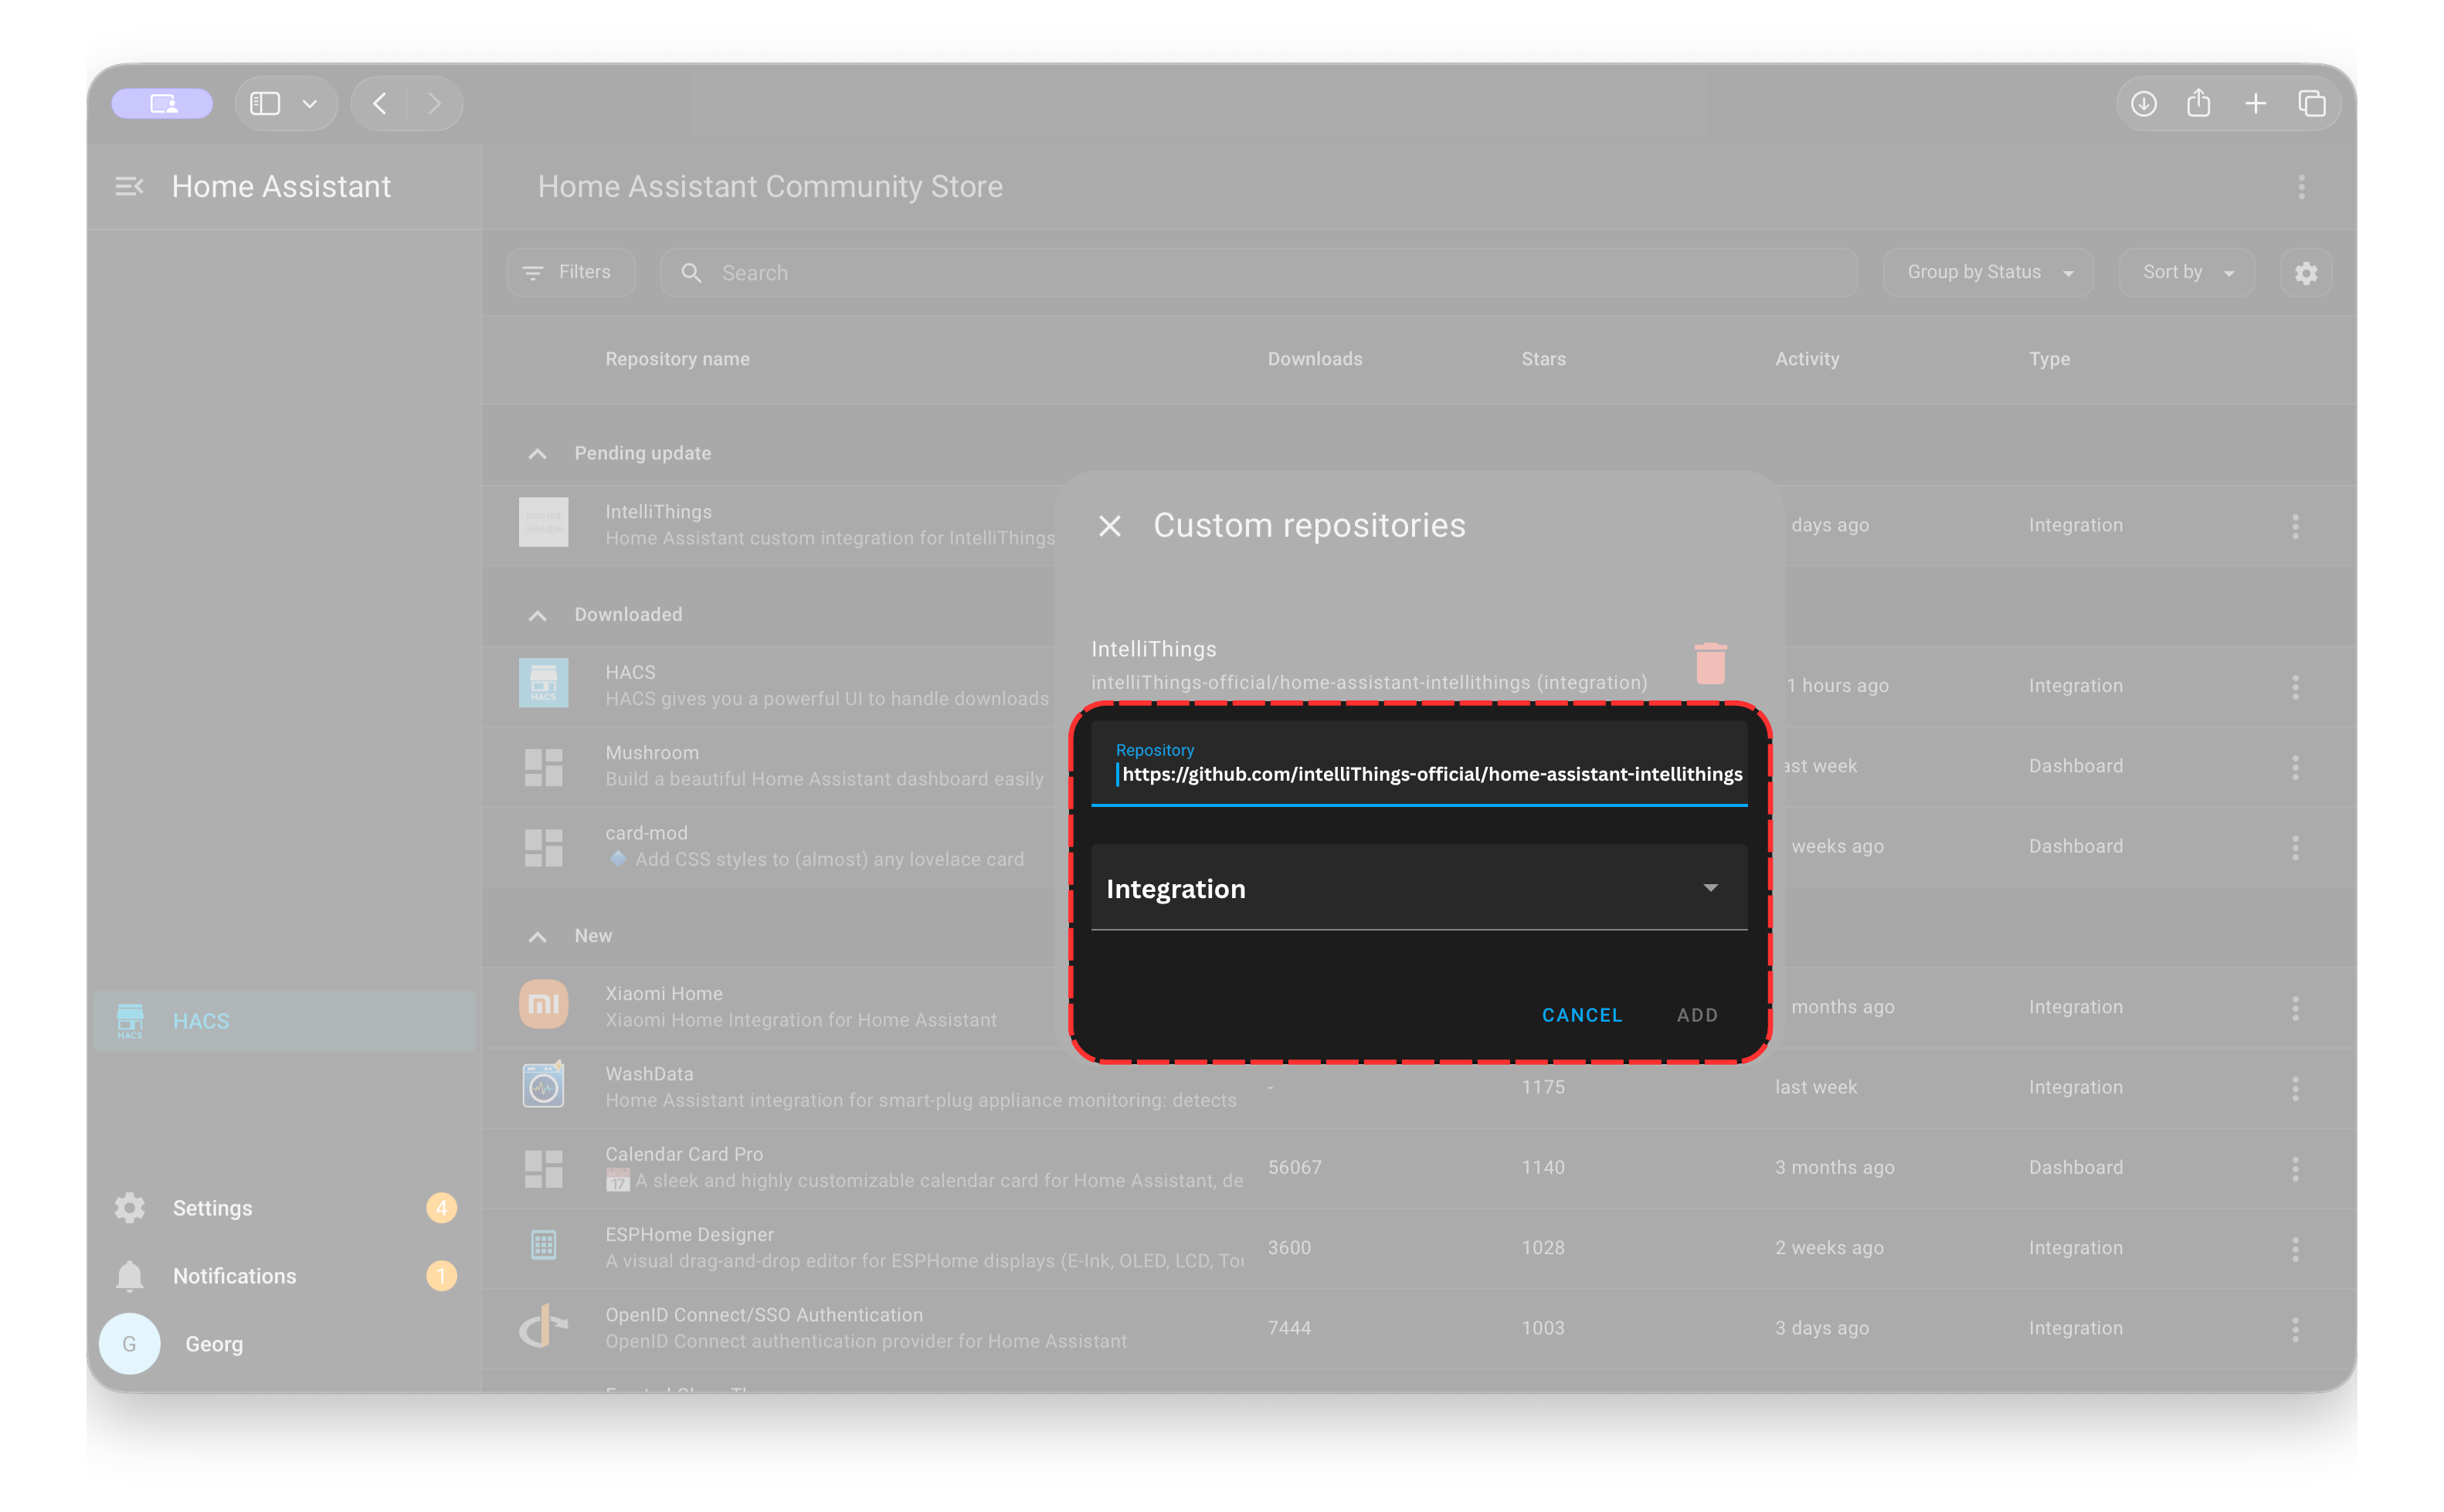
Paste the repository URL, select the category Integration, and click Add.
https://github.com/intelliThings-official/home-assistant-intellithingsDownload the integration
Search for intelliThings
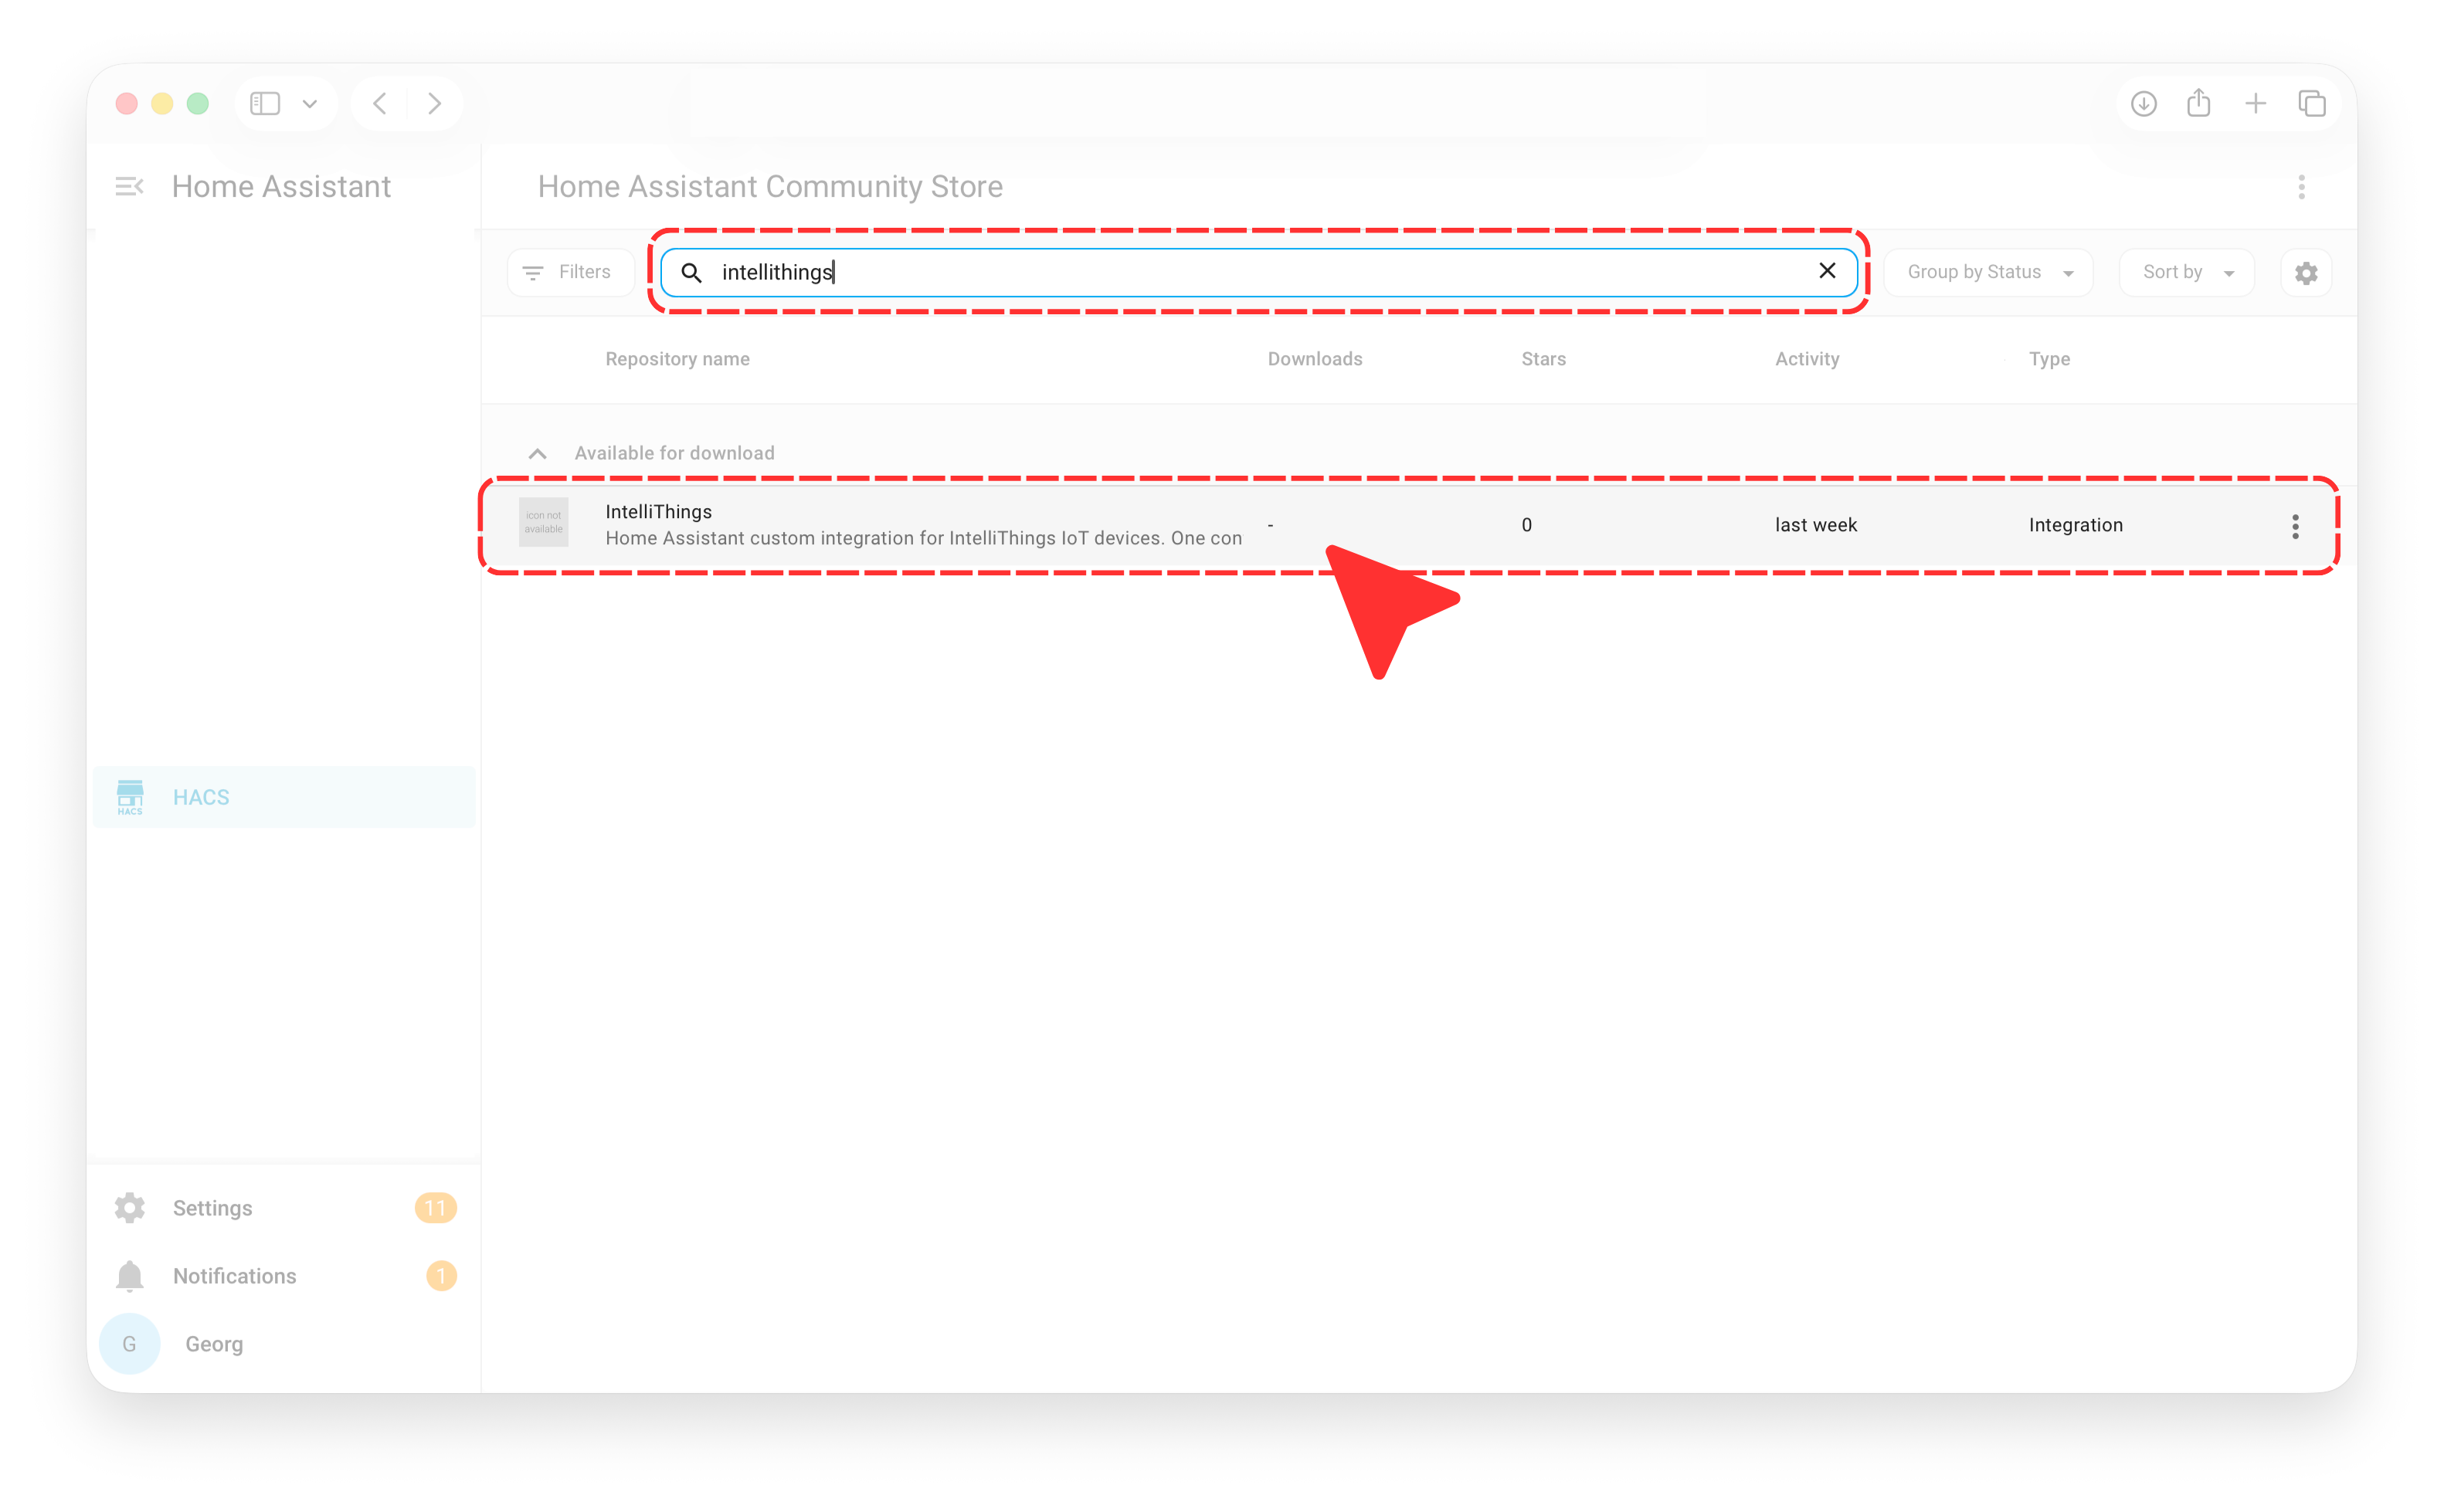
In HACS, search for intelliThings and open the result.
Open the repository page
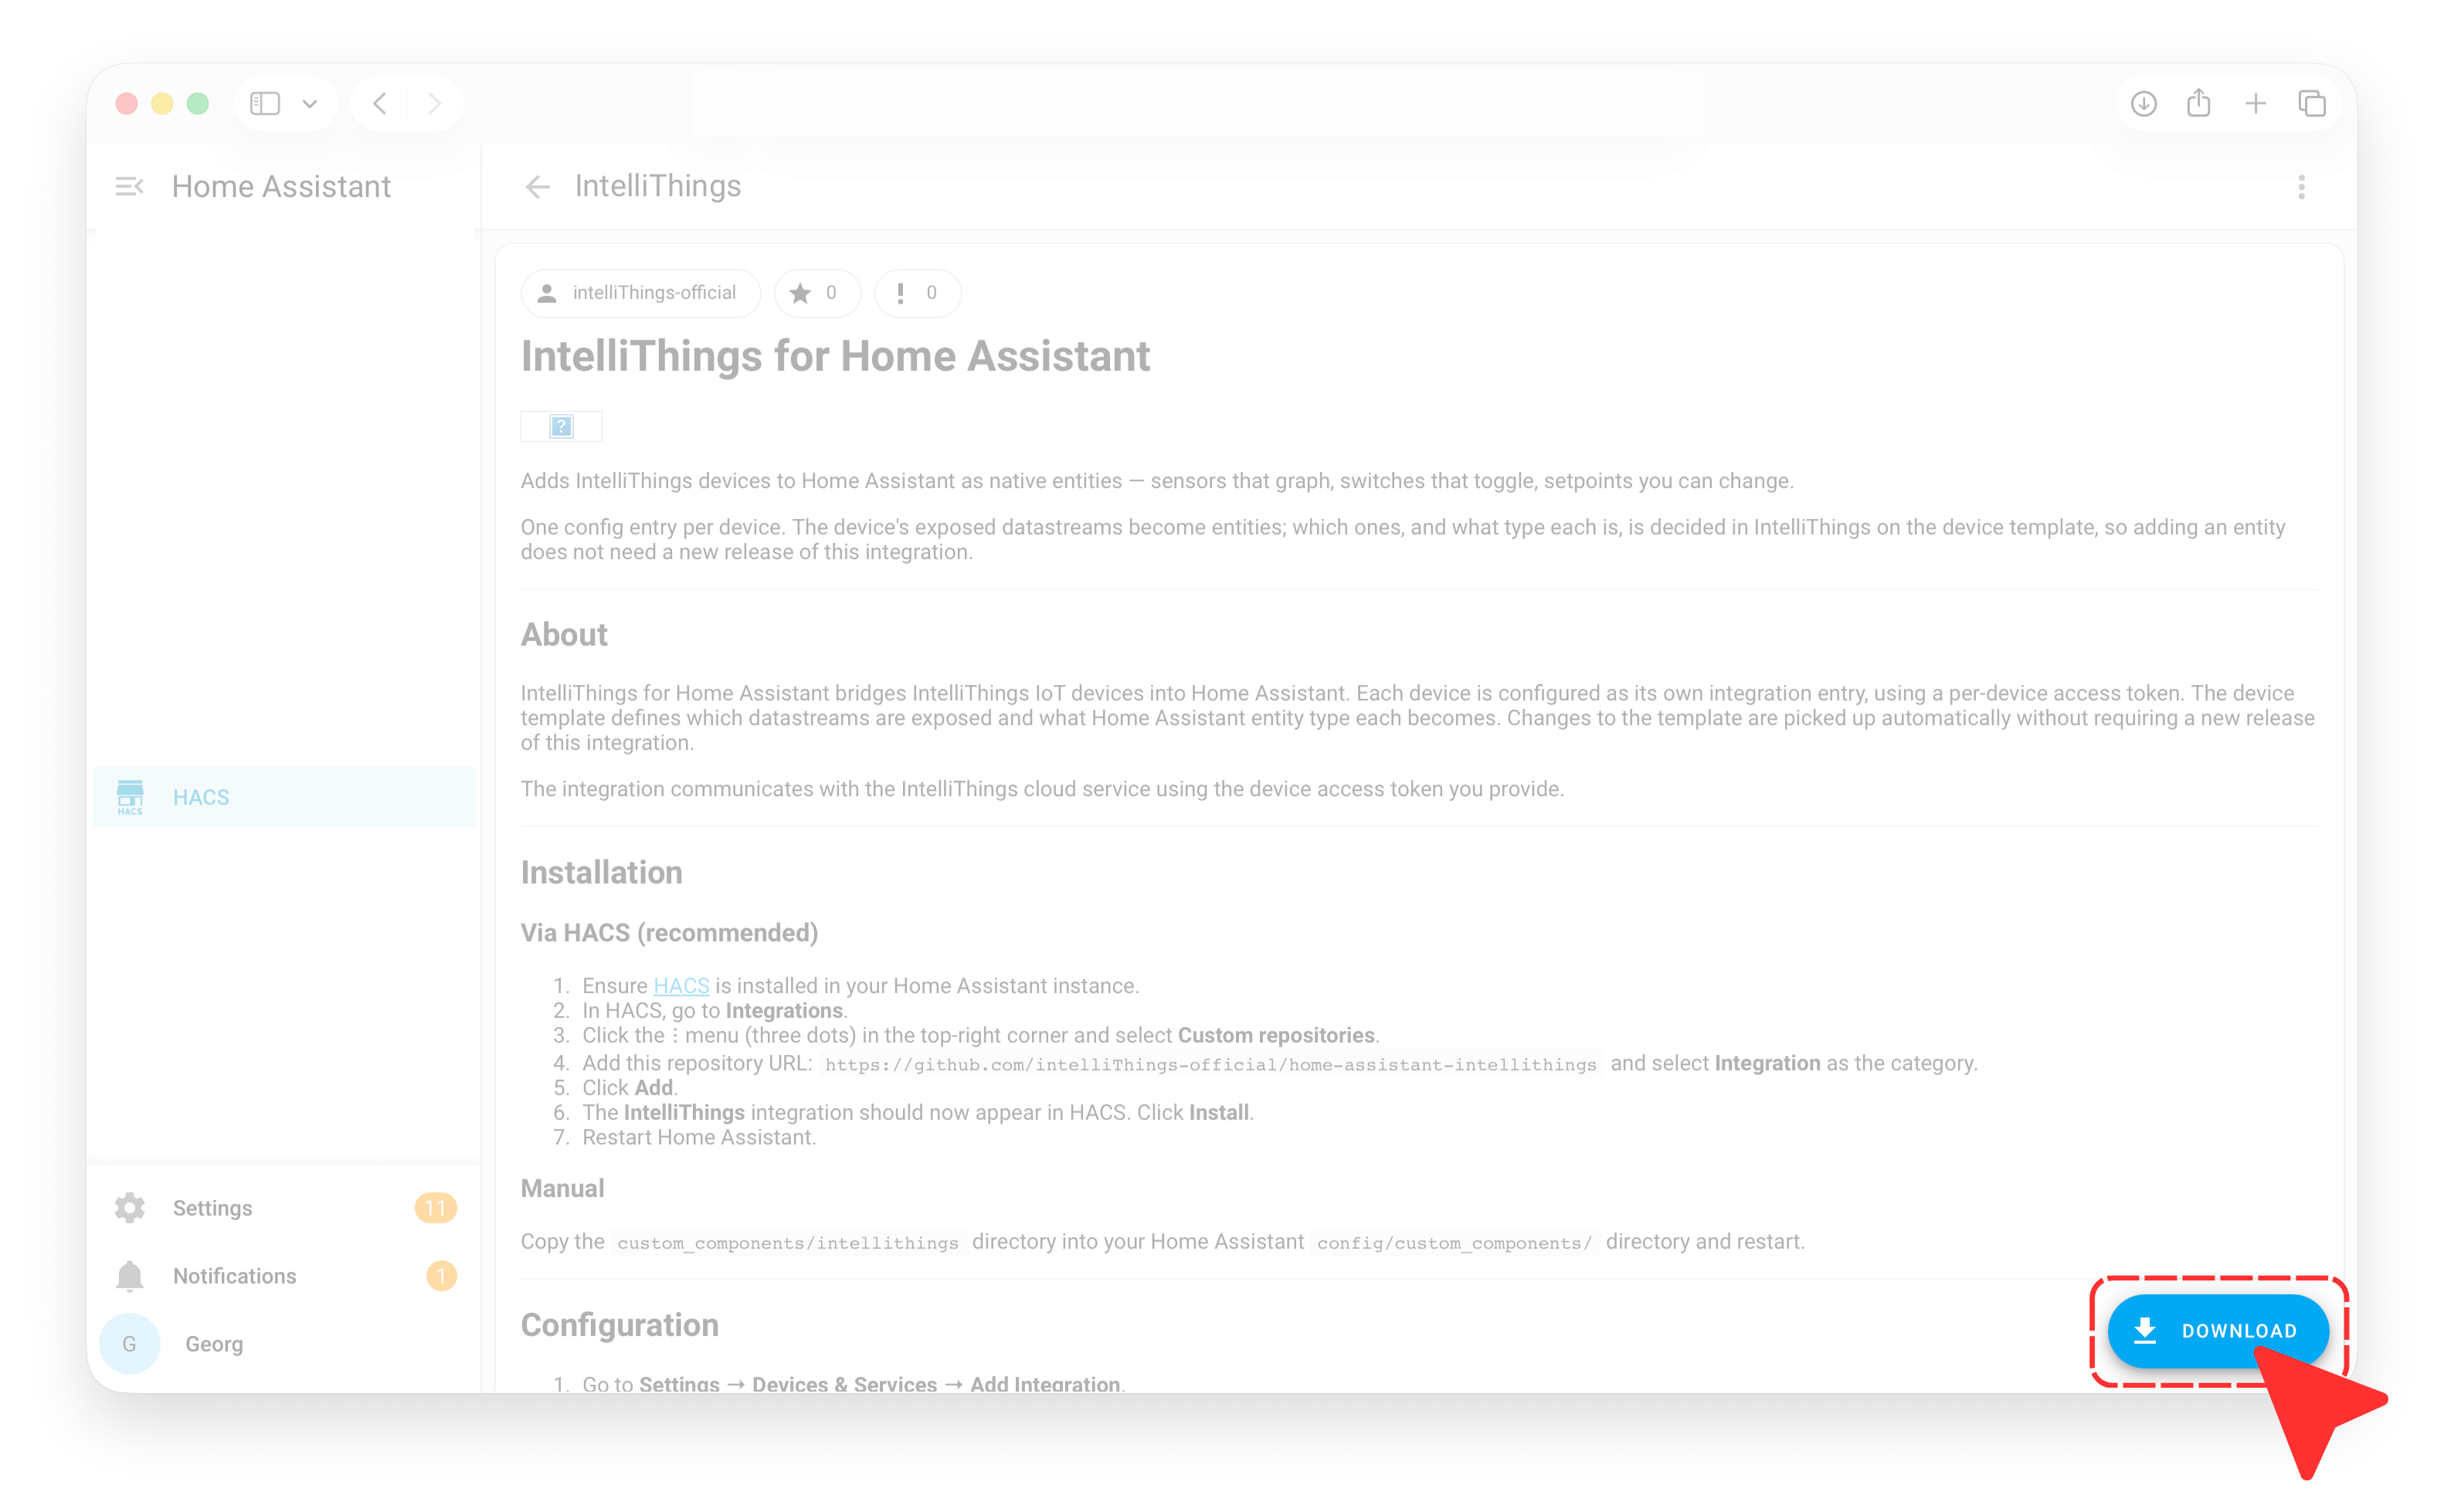
On the intelliThings repository page, click Download.
Confirm the download
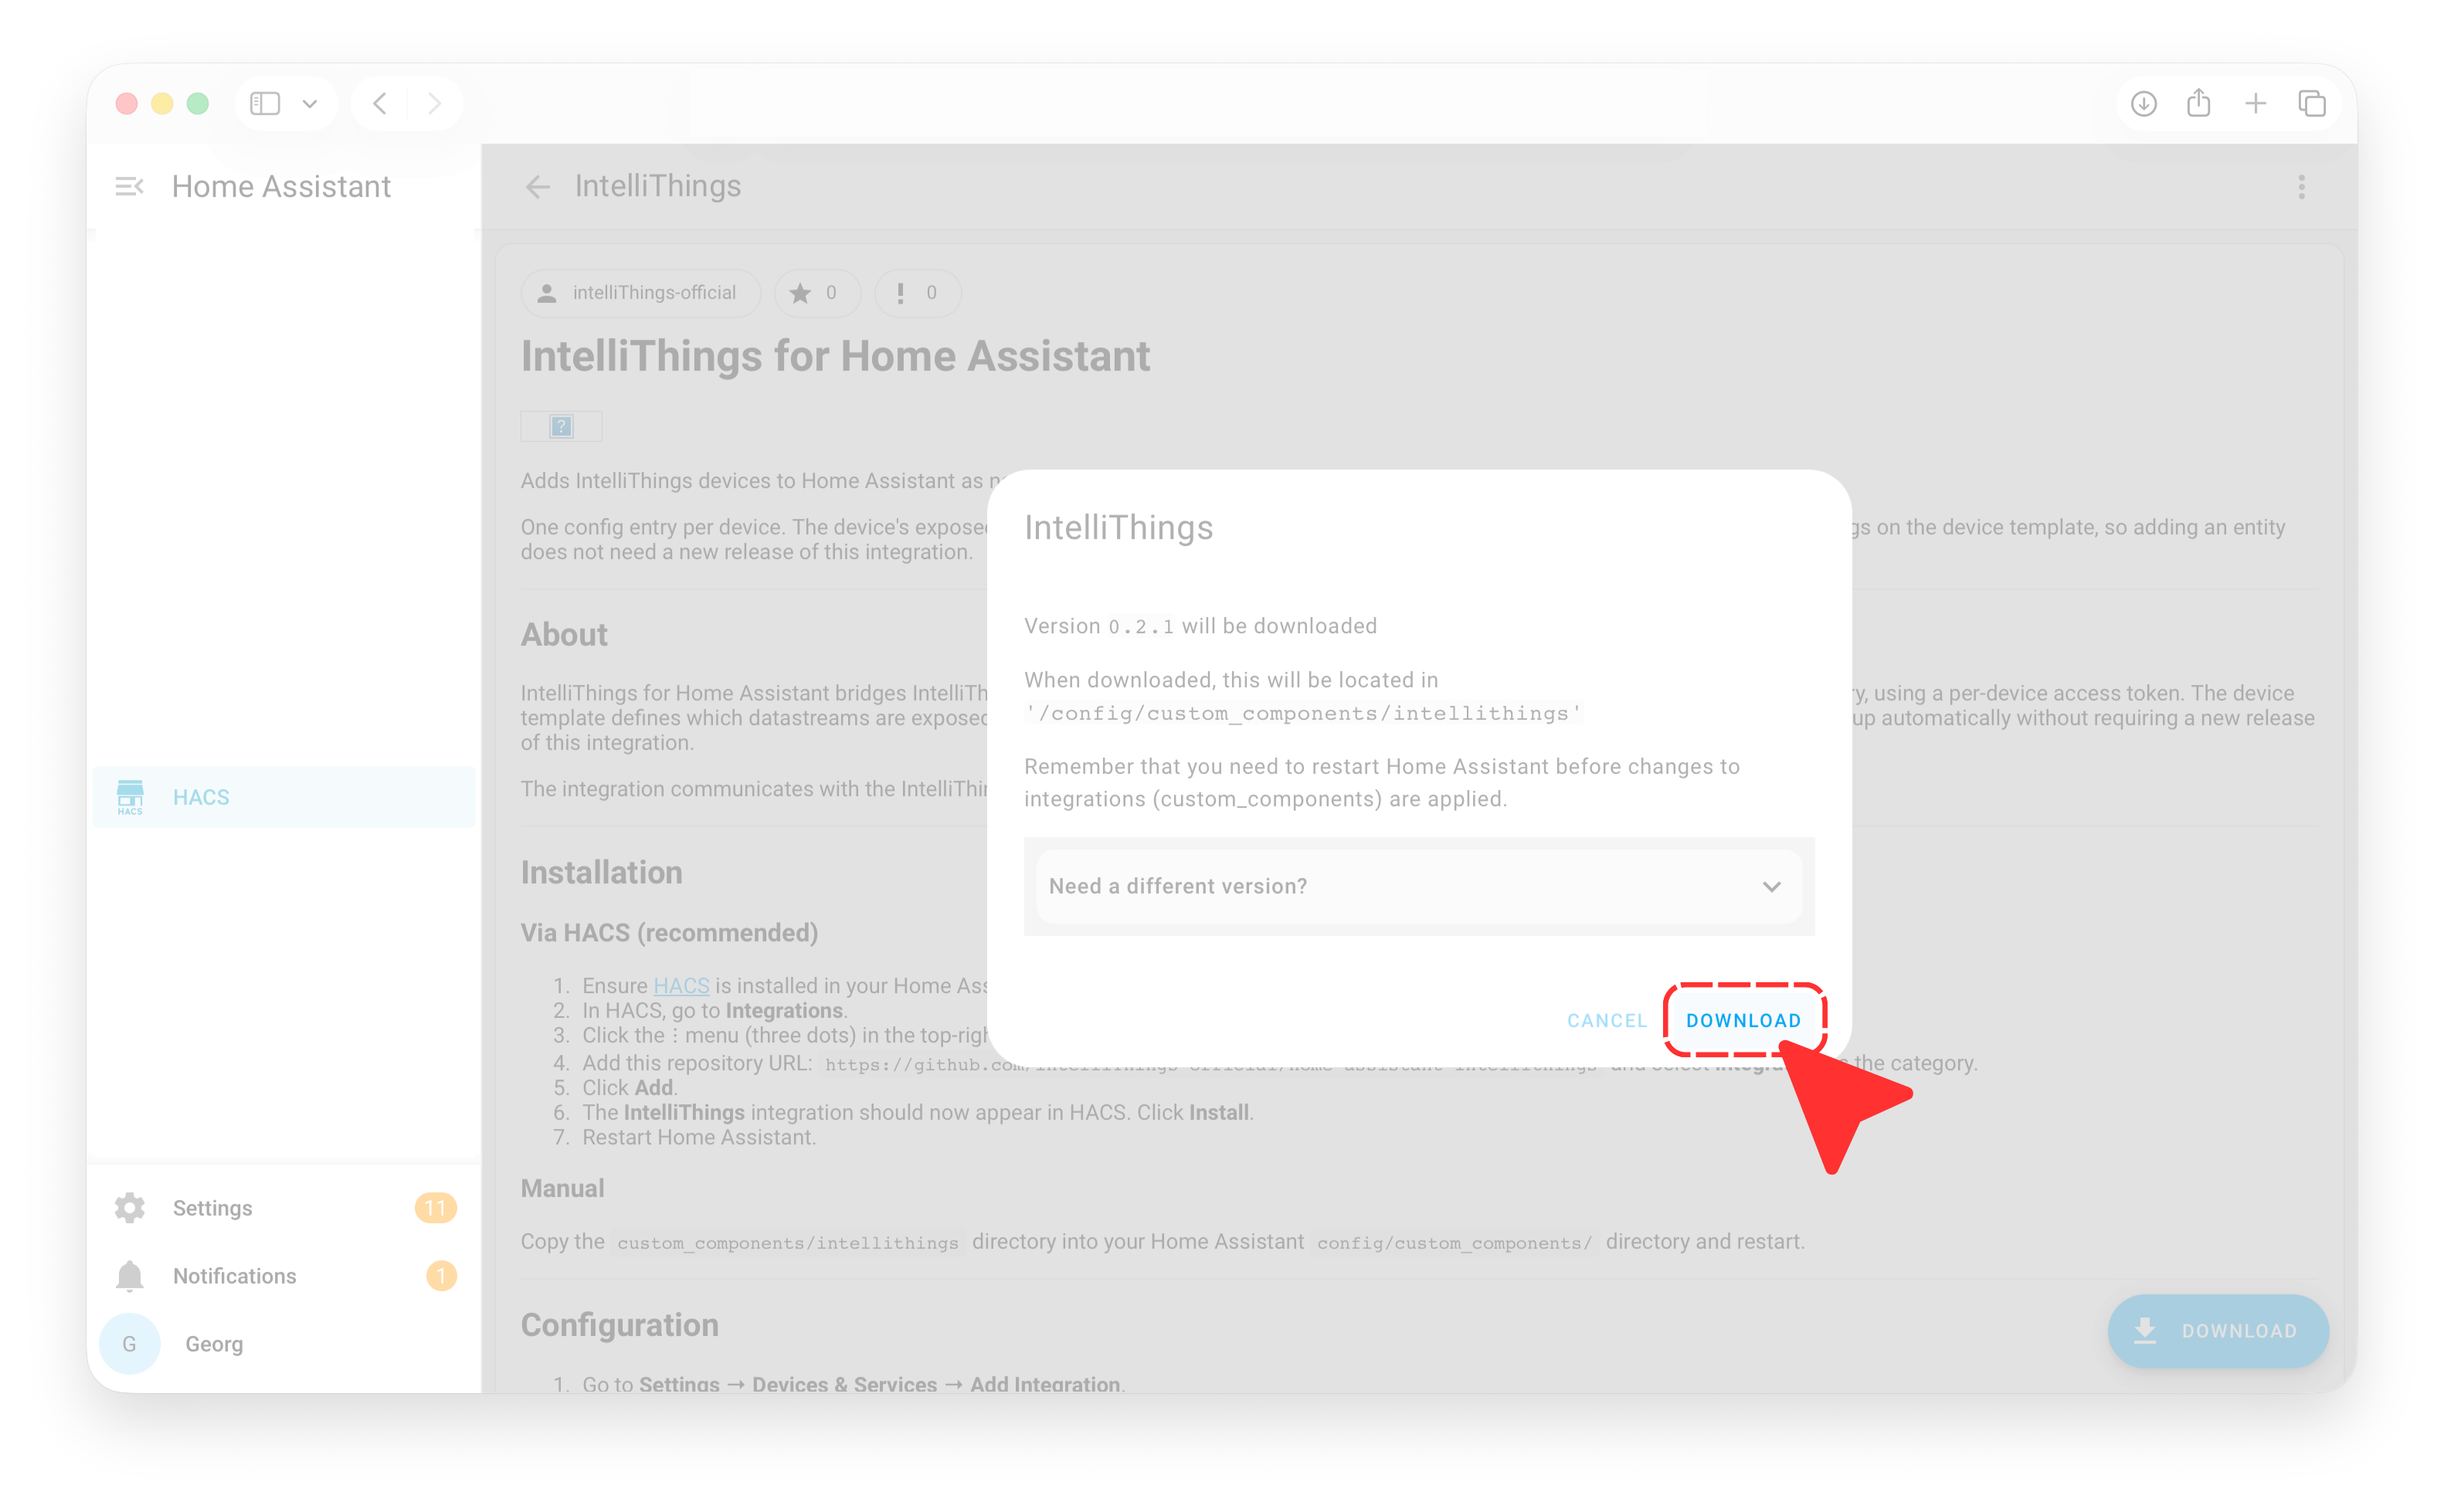
Confirm with Download to install the integration.
Restart Home Assistant
The newly installed custom integration requires a restart of Home Assistant.
Open the restart repair
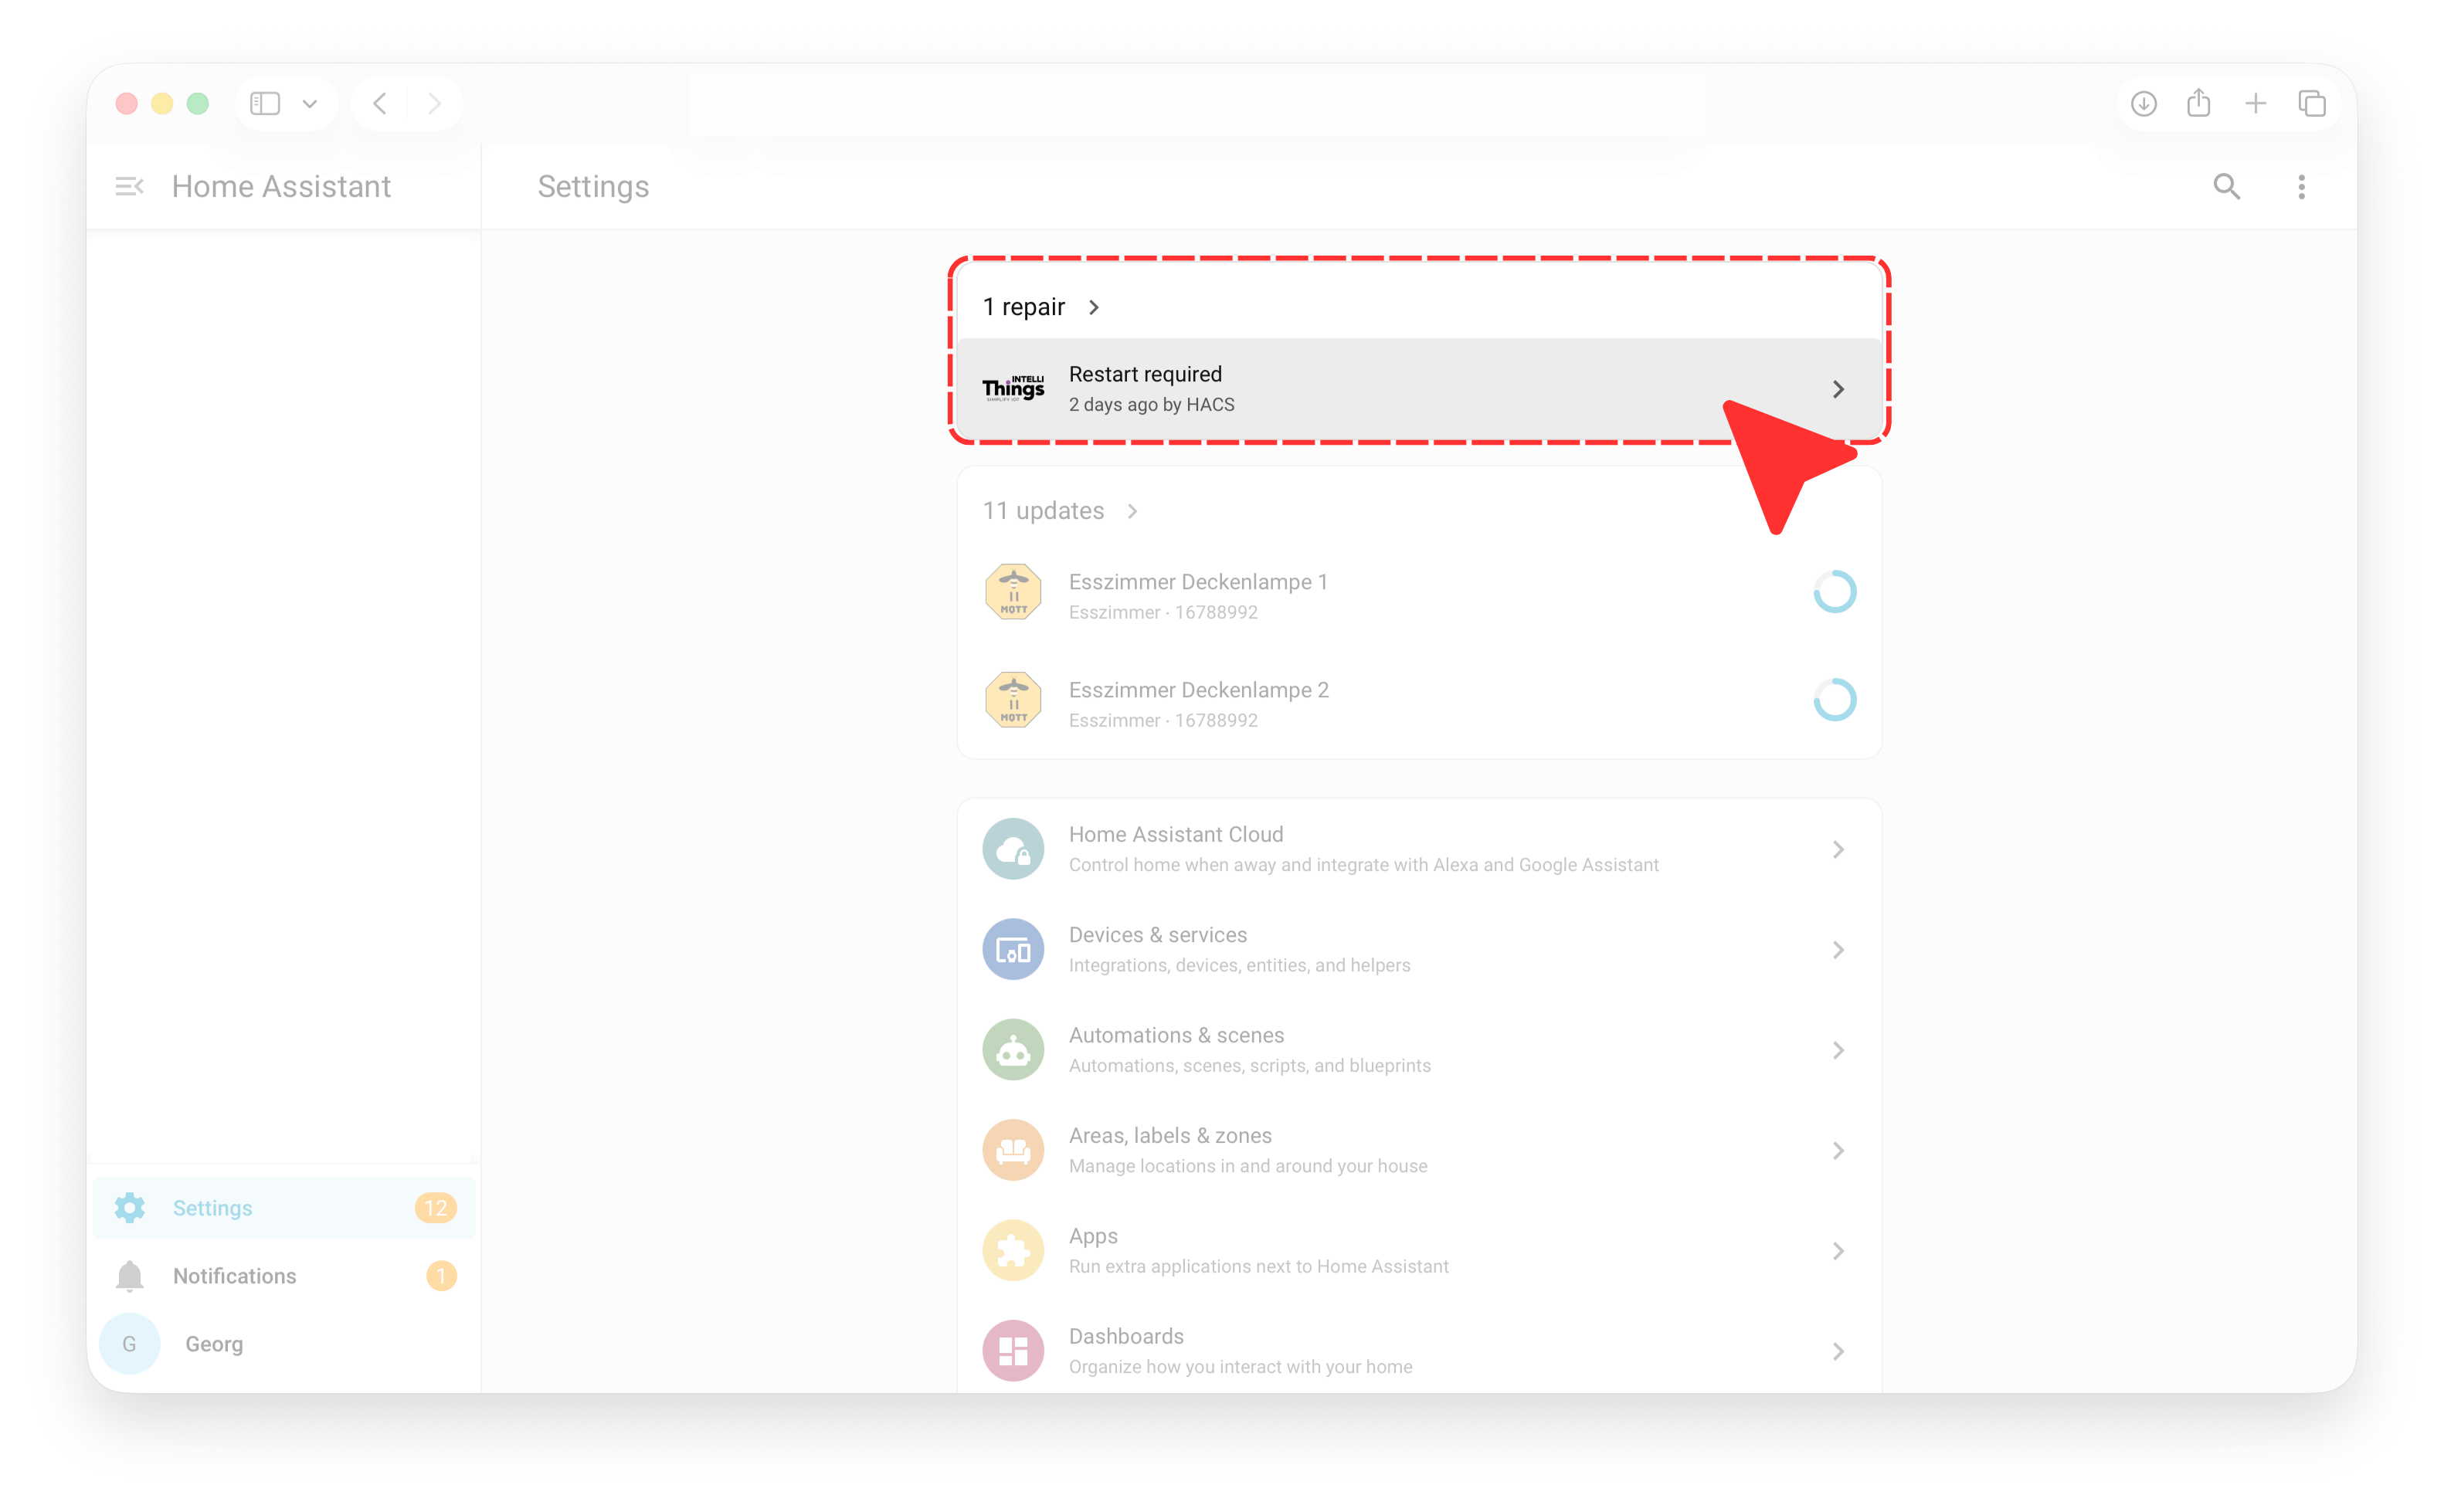
In Home Assistant Settings, open the Restart required repair item. The restart loads the newly installed custom integration.
Confirm the restart
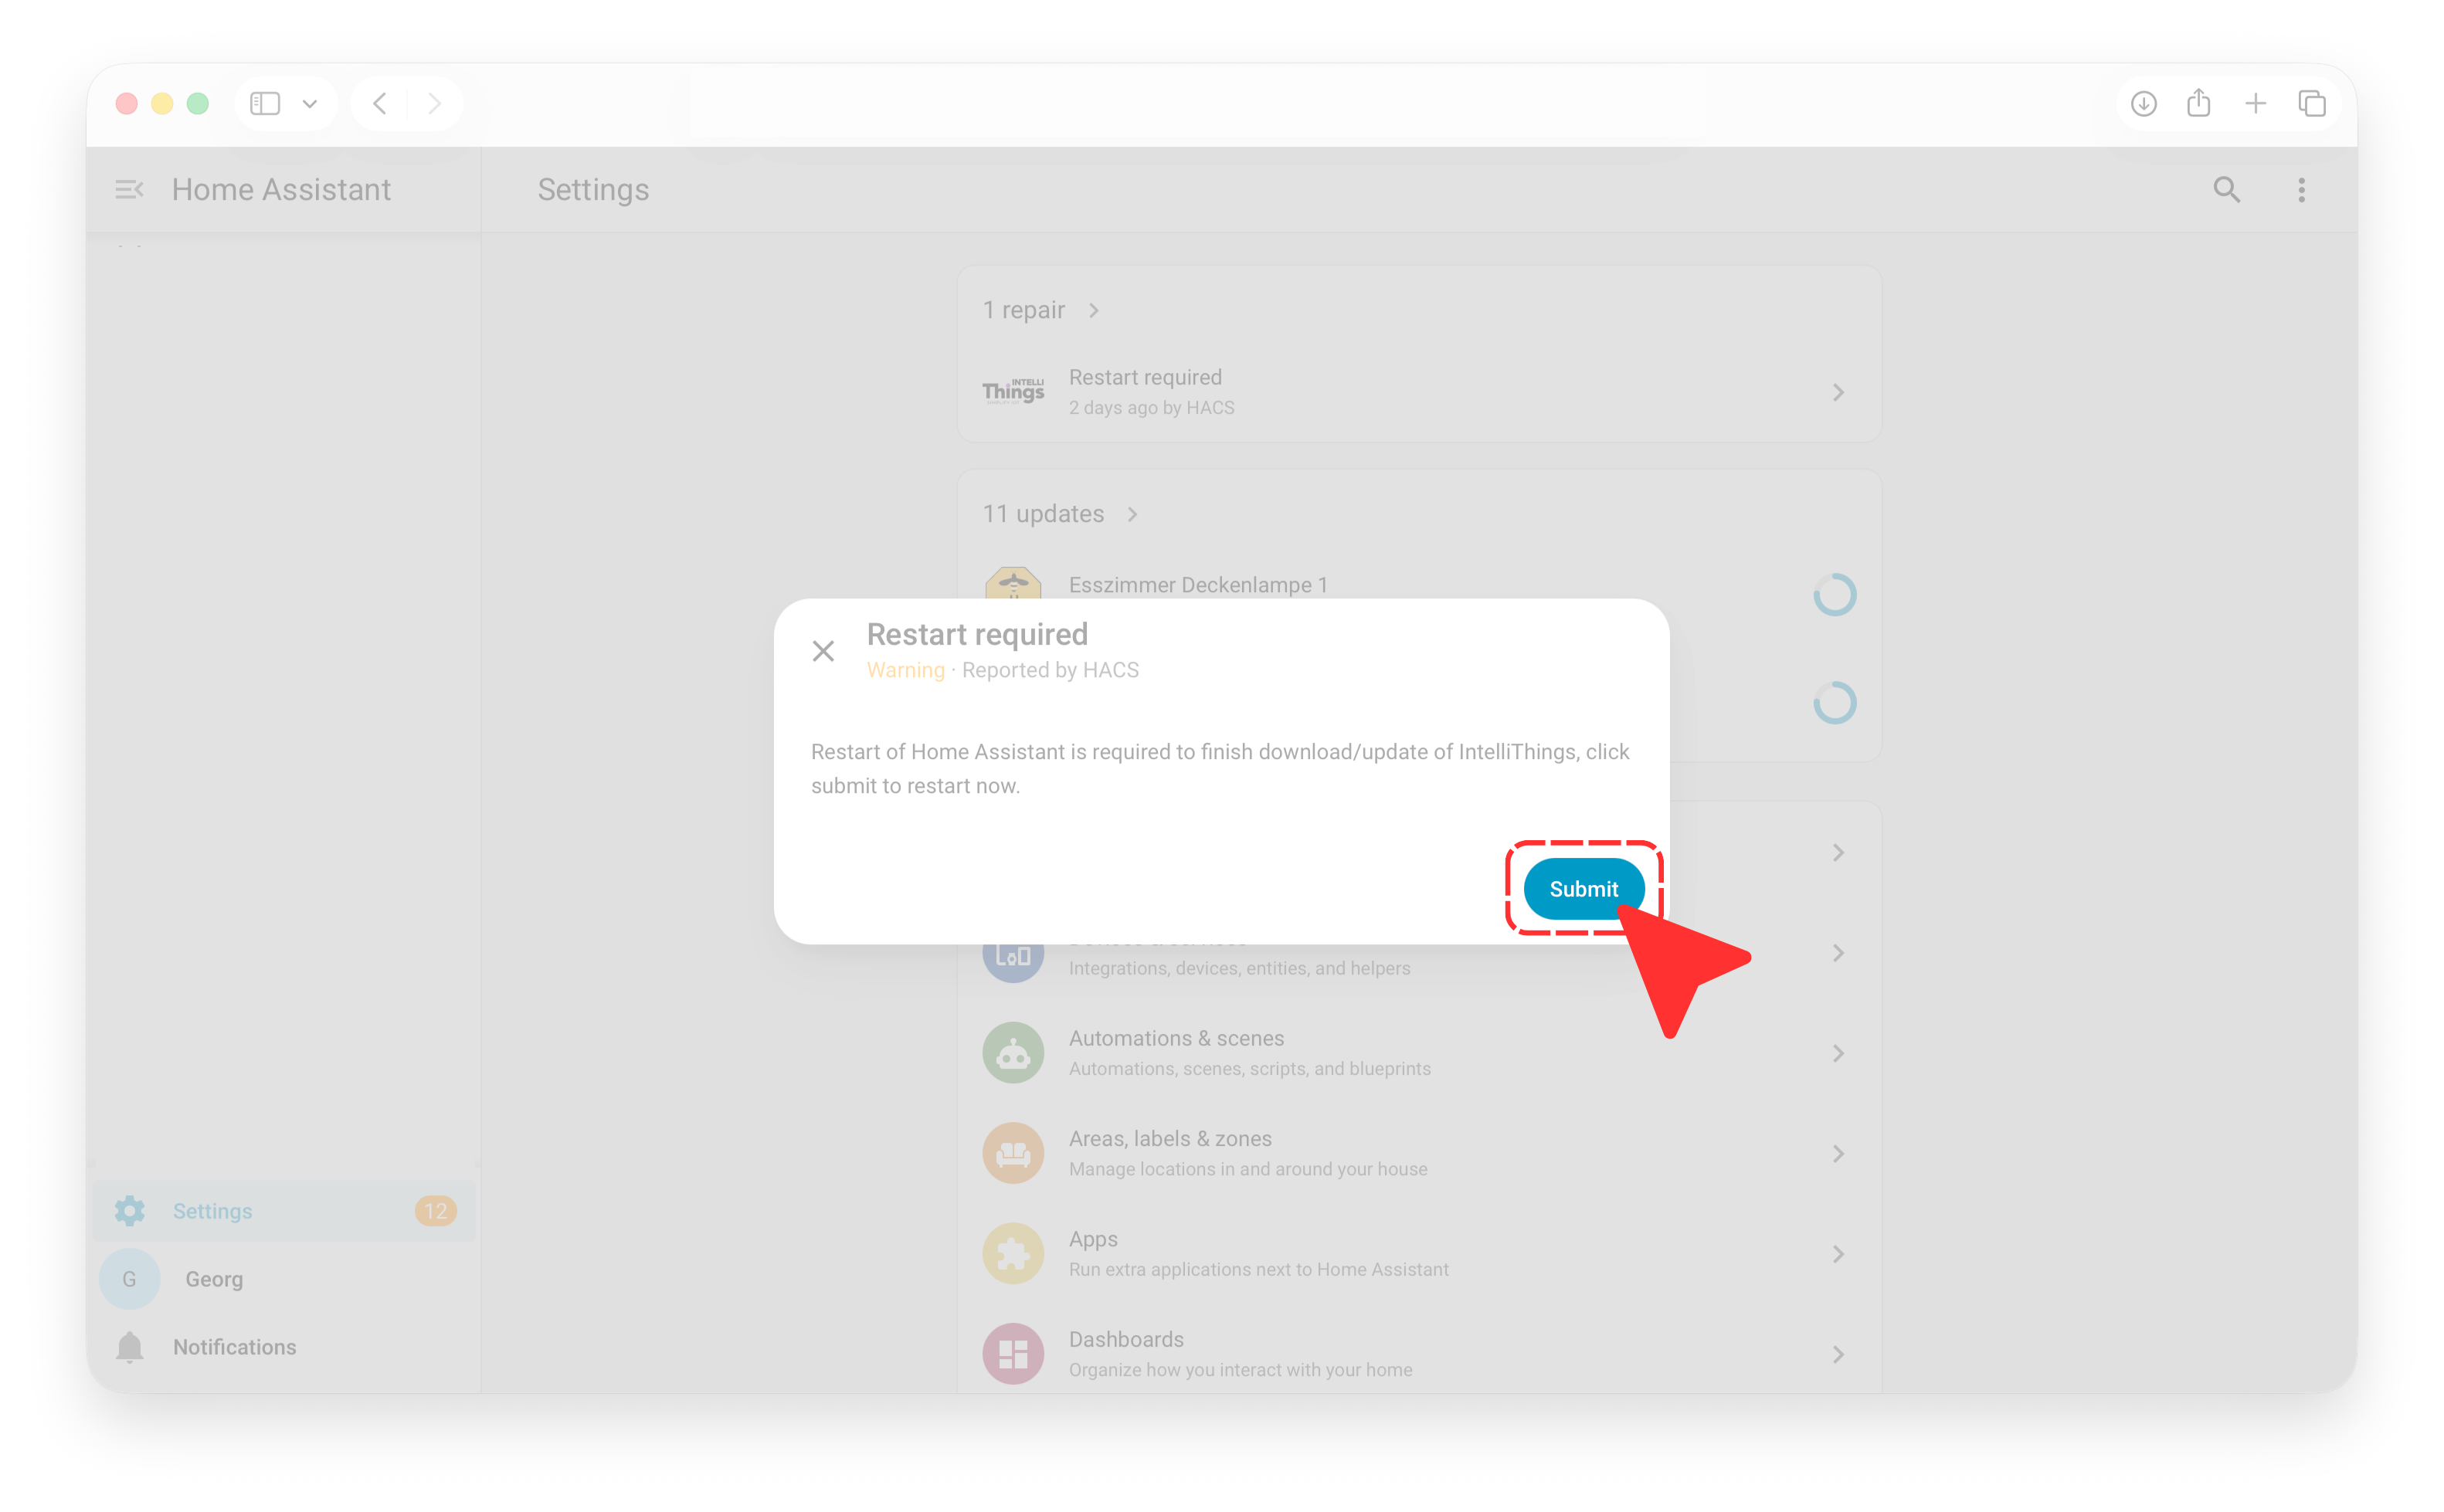
Click Submit. Home Assistant may be temporarily unavailable while it restarts.
Finish
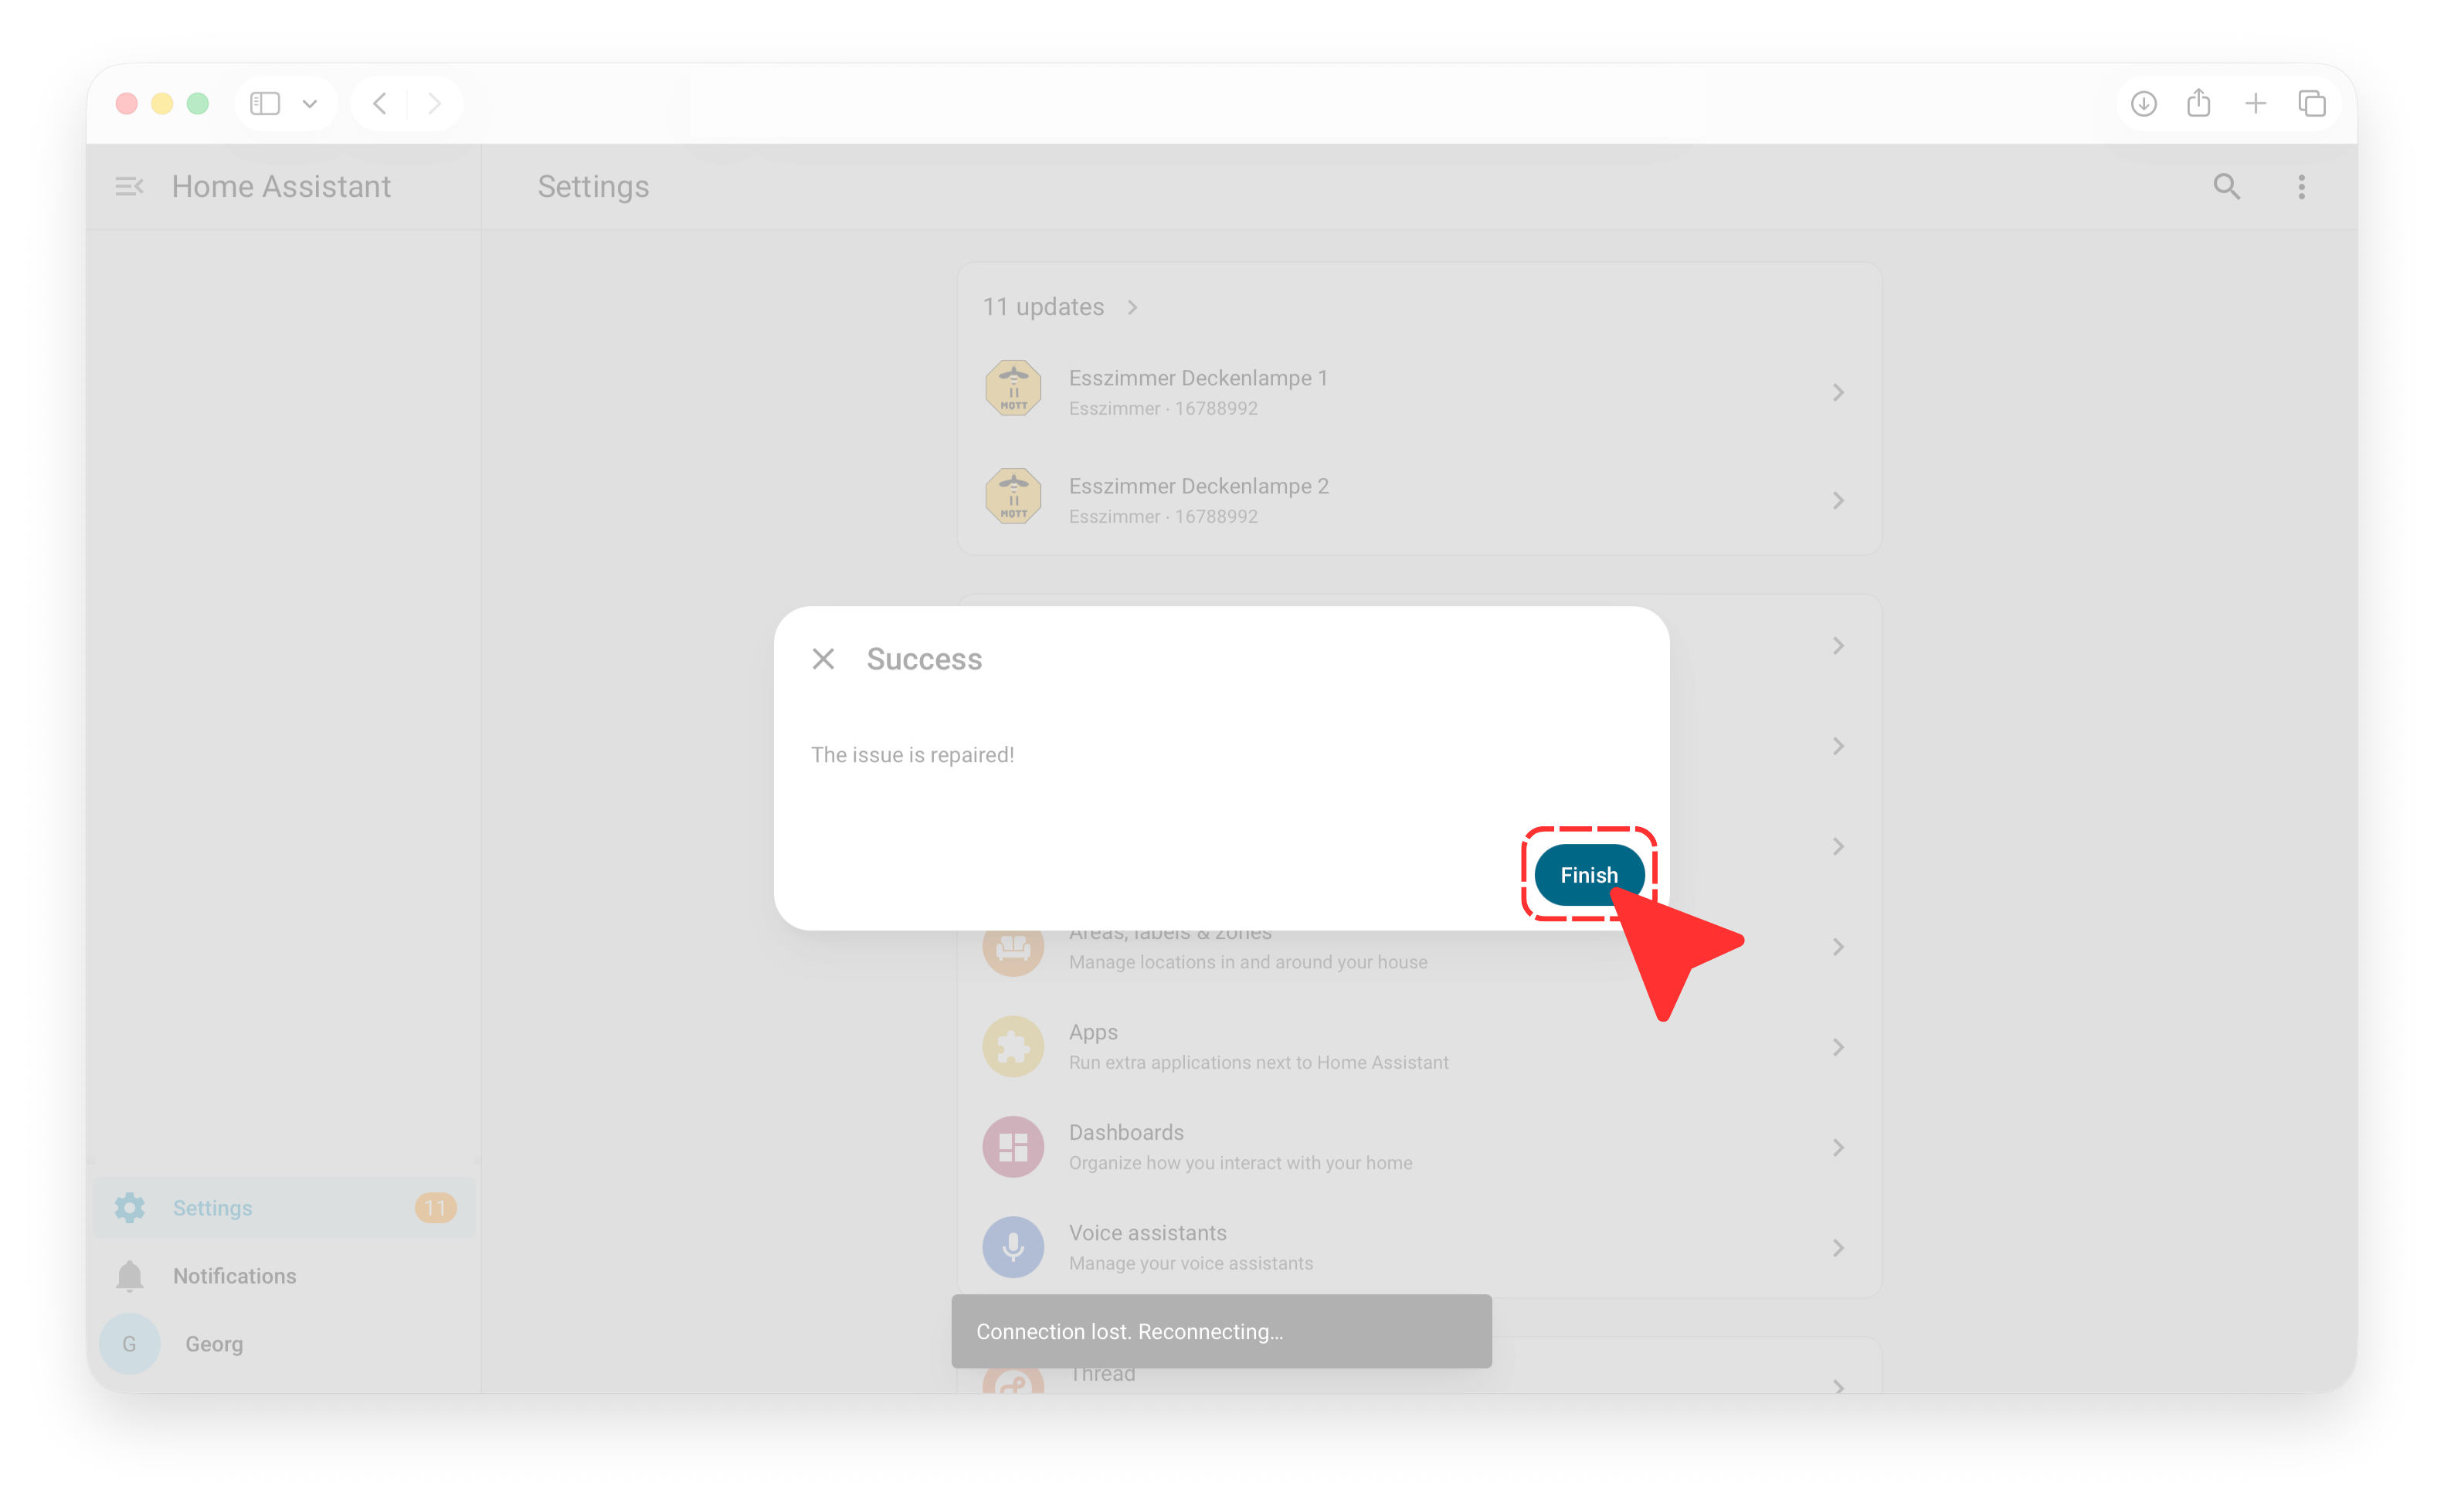
Click Finish to close the dialog.
Add the intelliThings integration
Open Devices & services
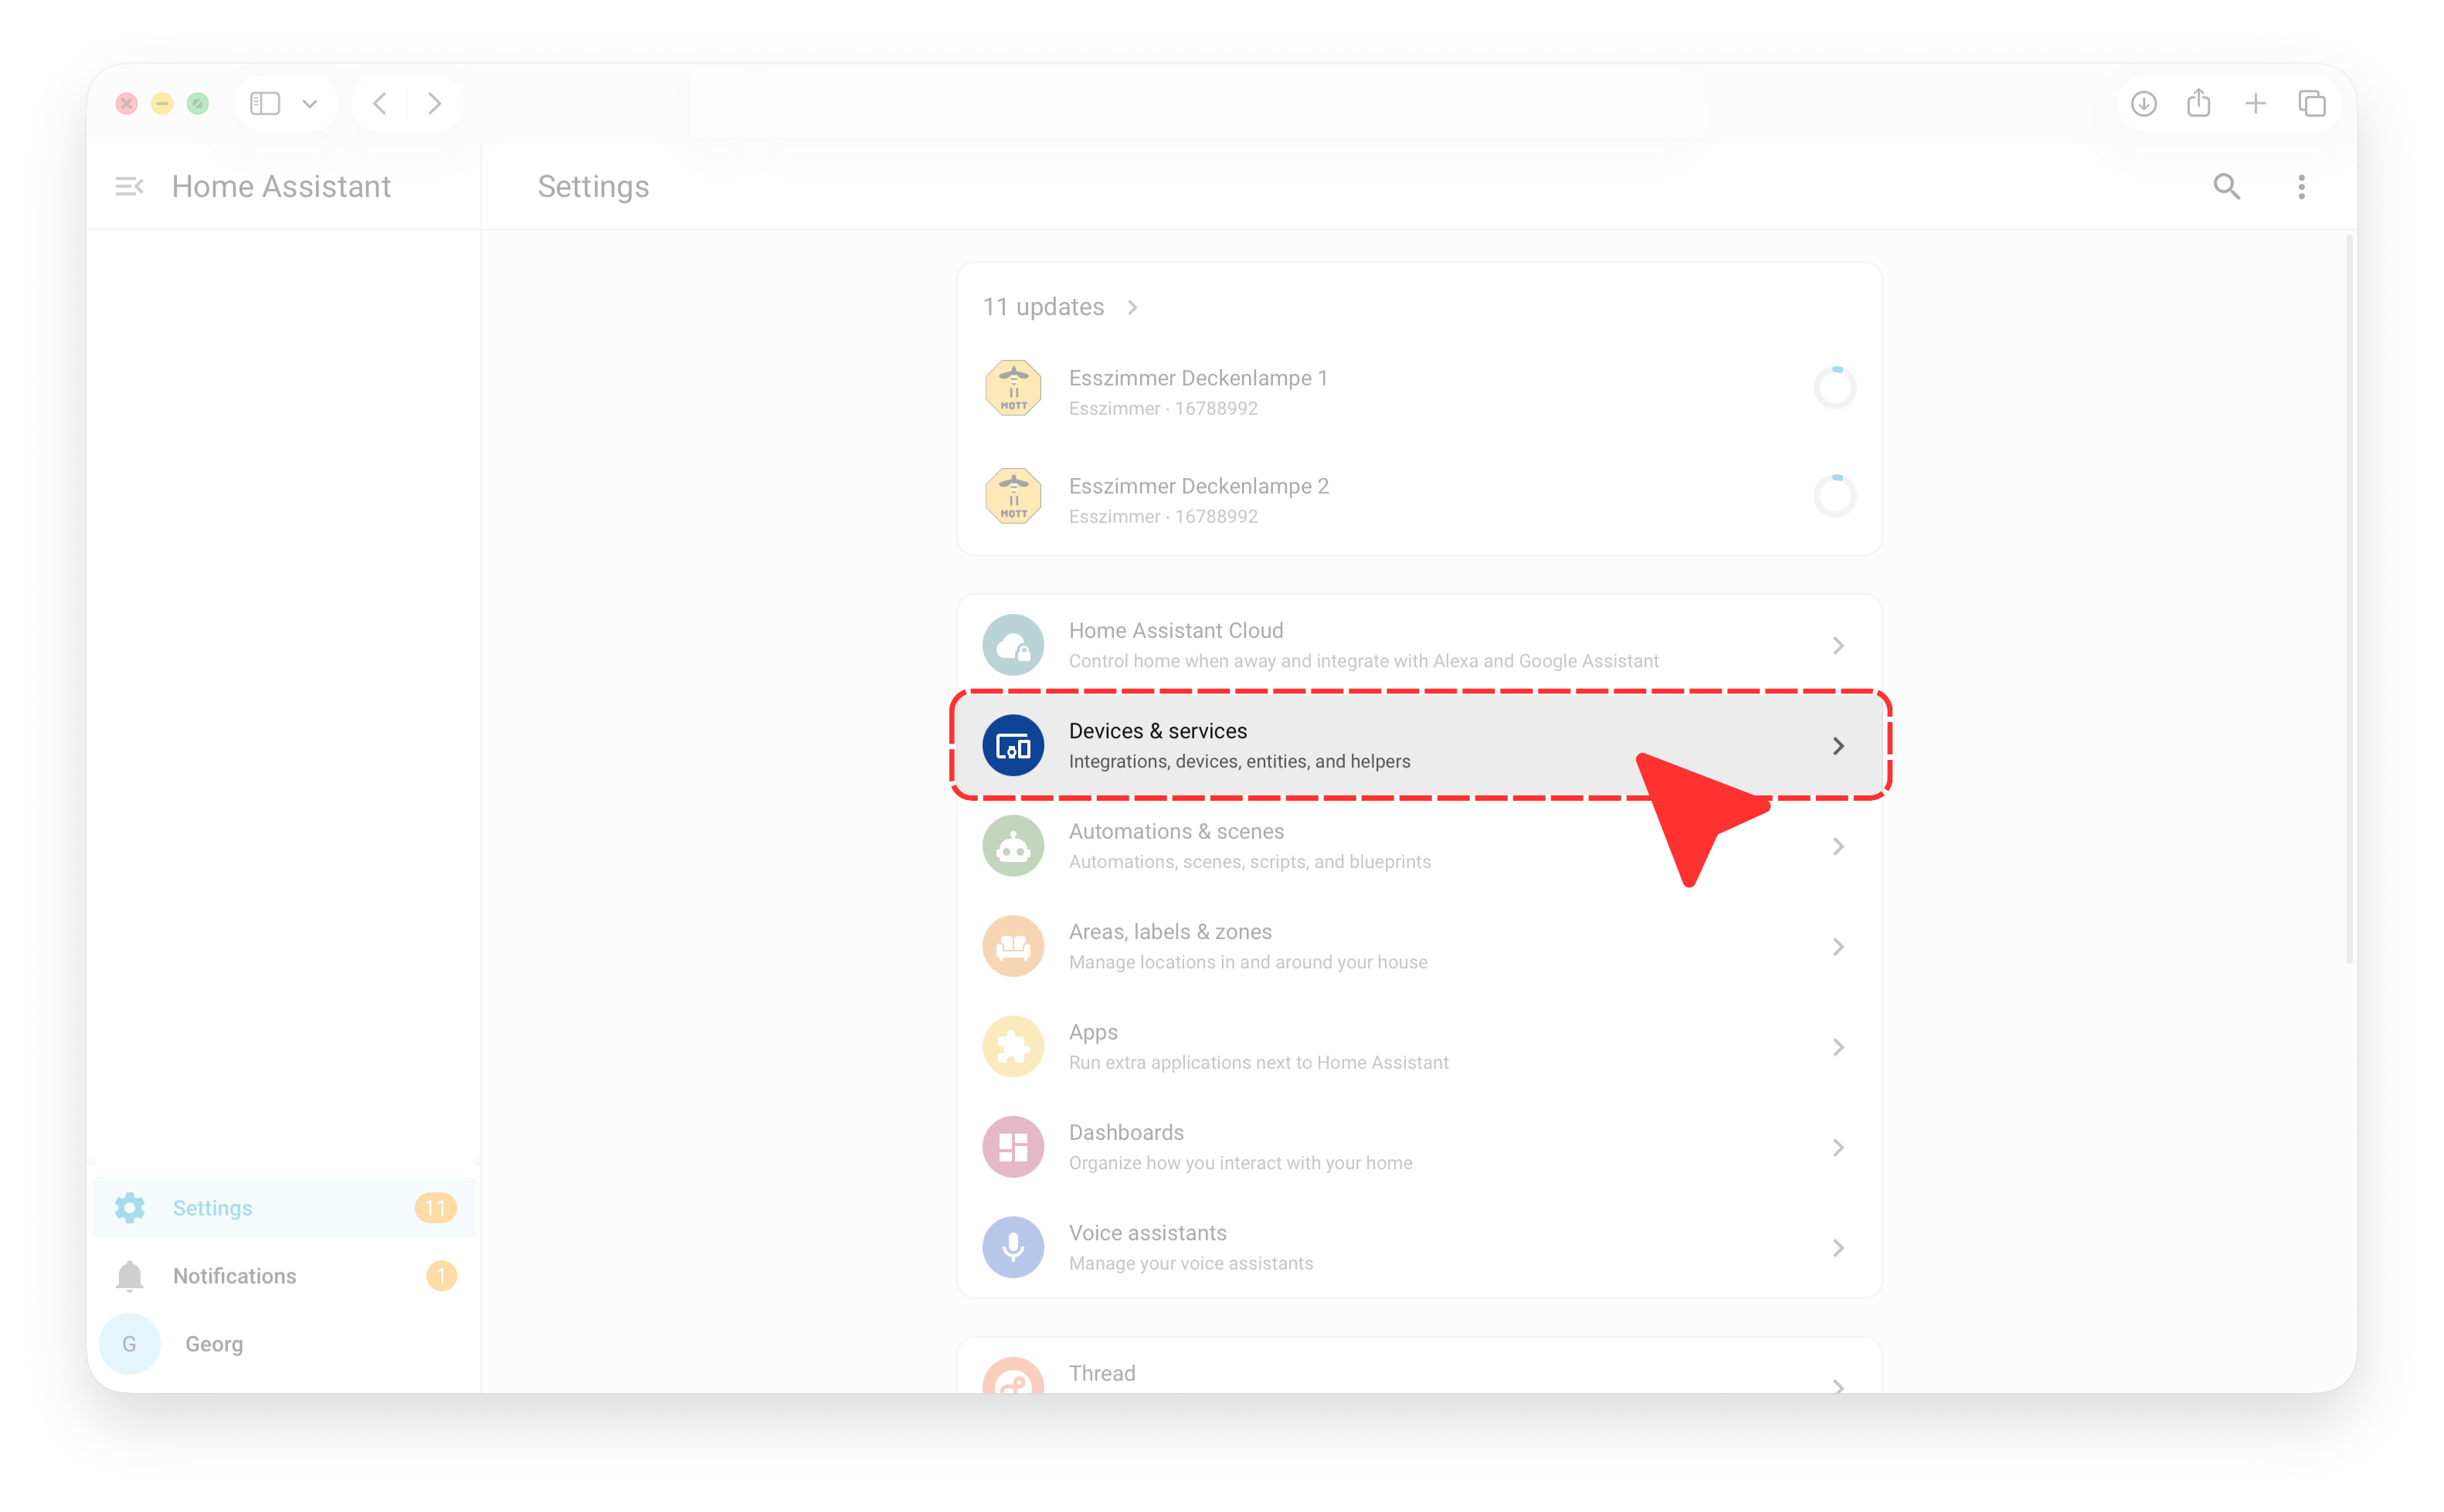
Go to Settings → Devices & services.
Add an integration
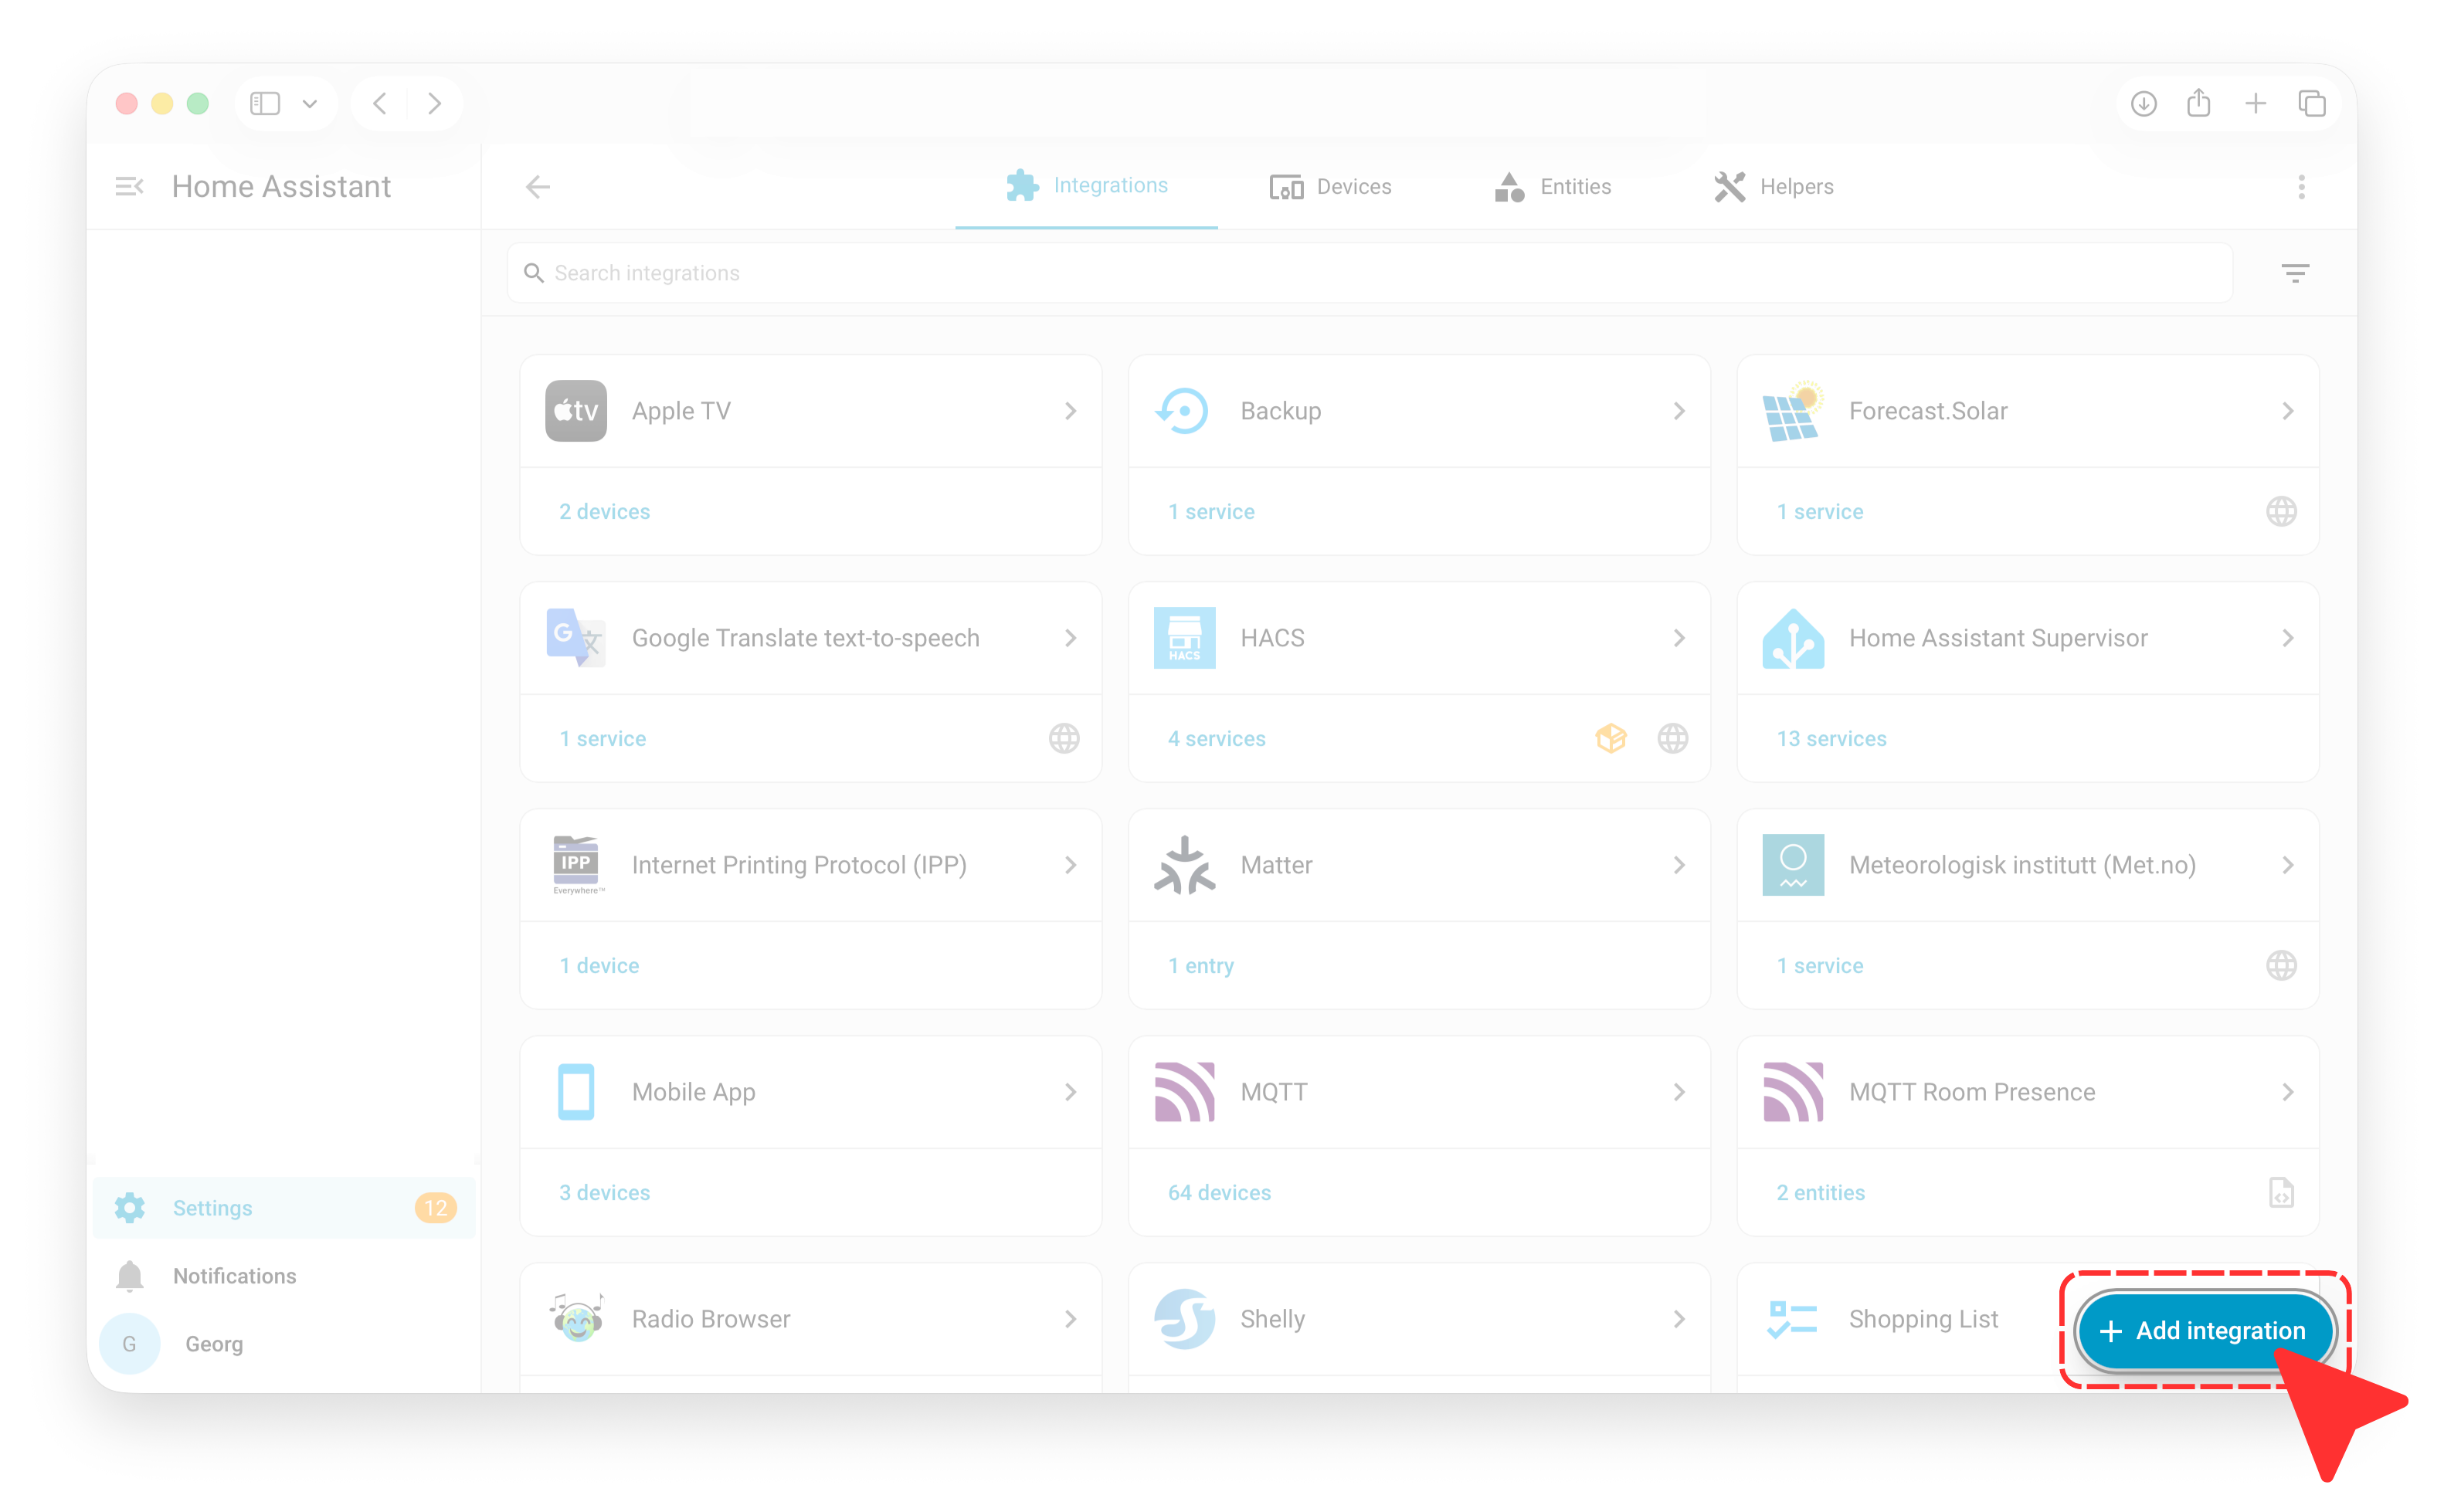
Click Add integration.
Select intelliThings
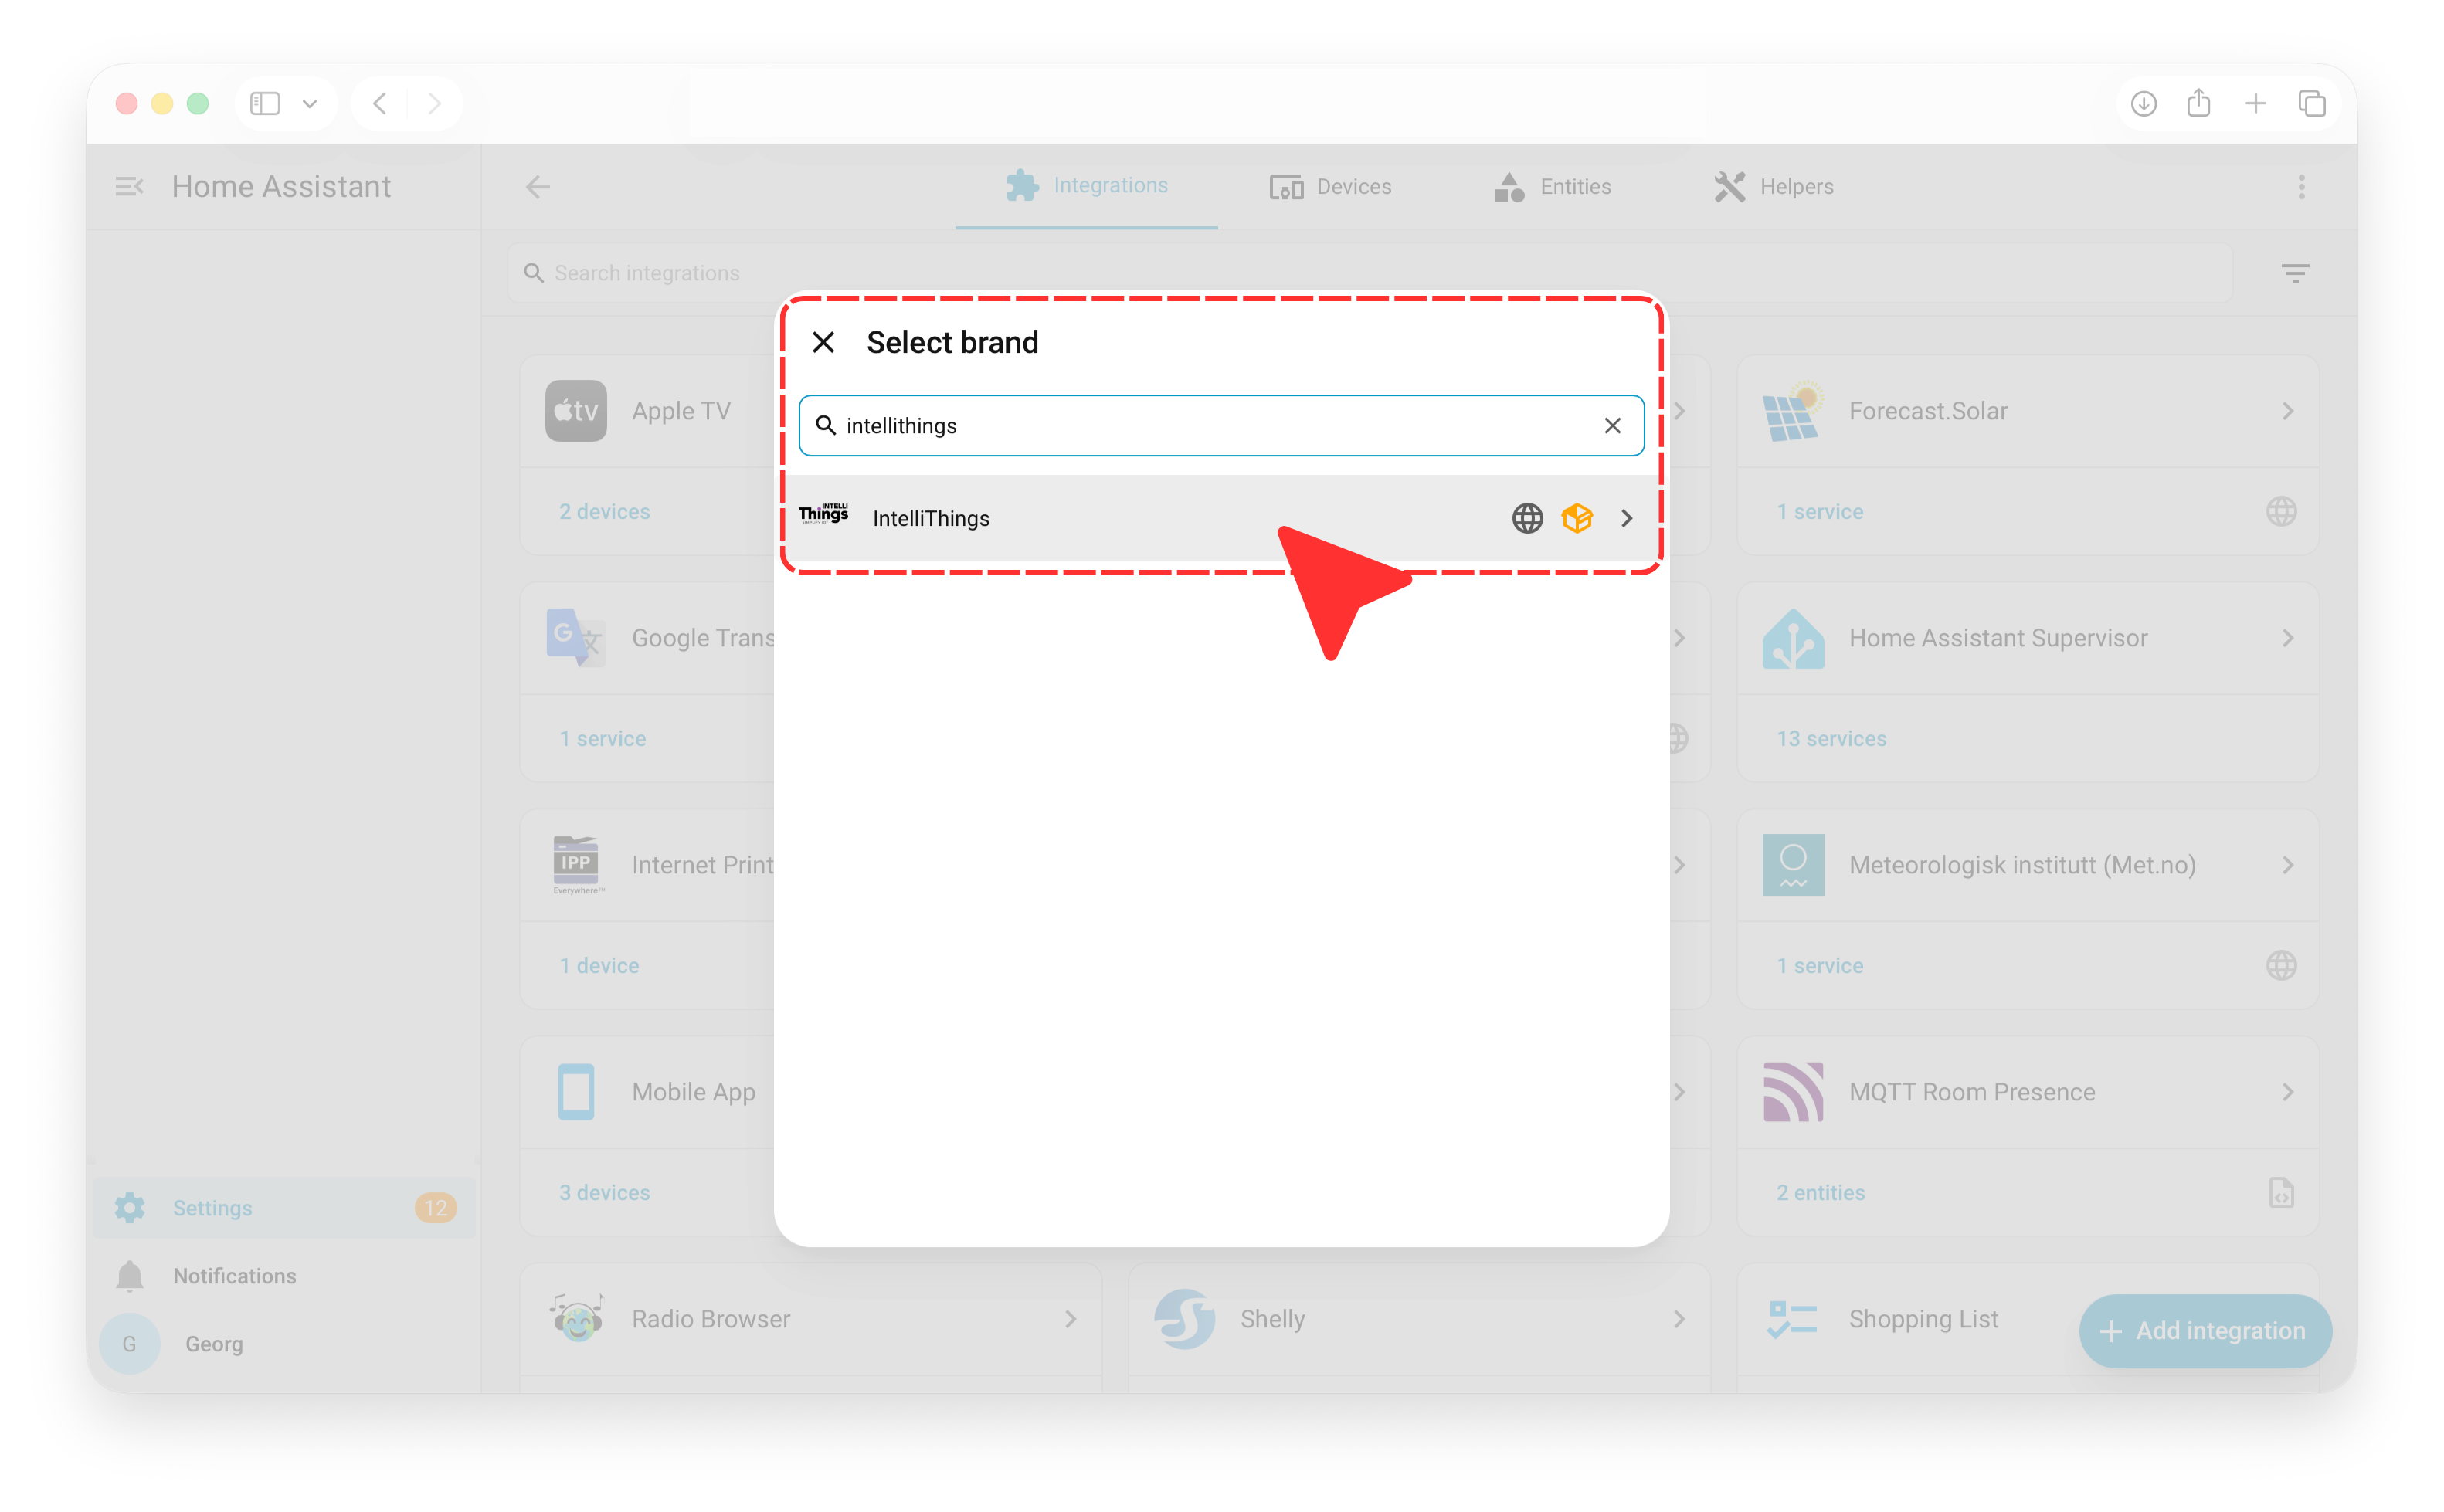
Search for intelliThings and select it. intelliThings is the platform integration used by myCistern.
Connect the myCistern device
Enter the connection details
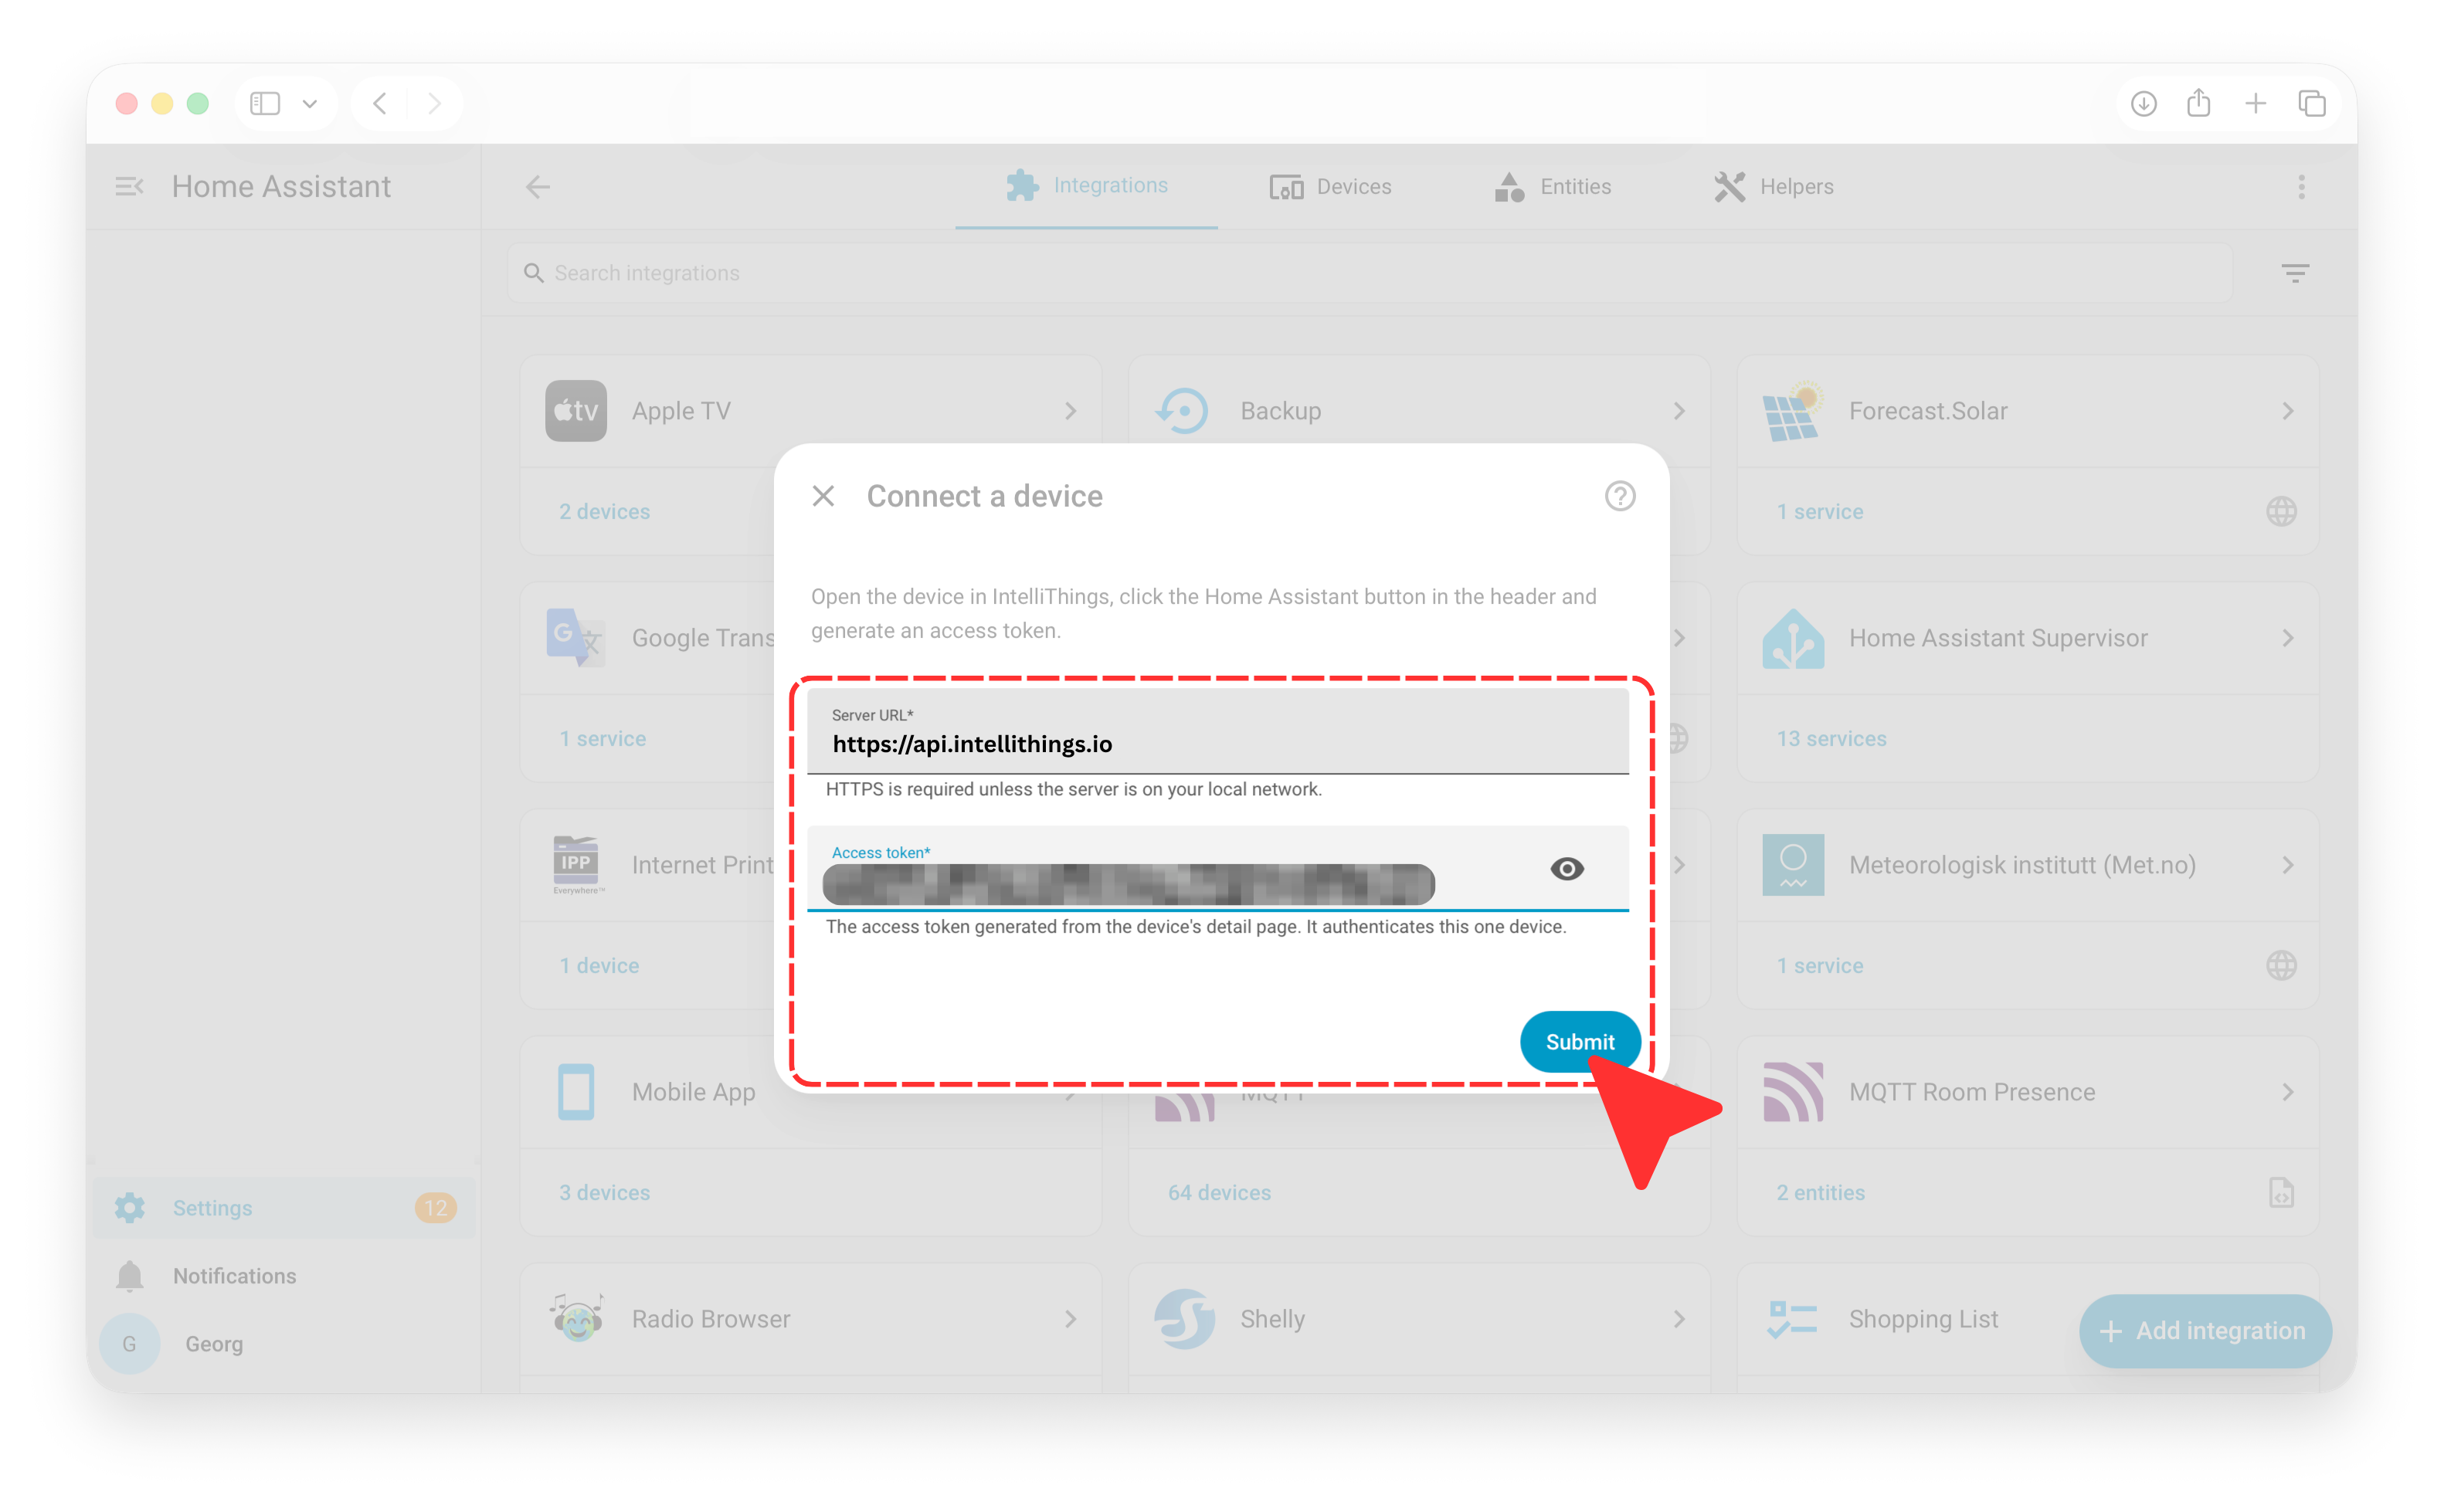
Enter the server URL and the access token generated in myCistern earlier, then click Submit.
https://api.intellithings.ioName and assign the device
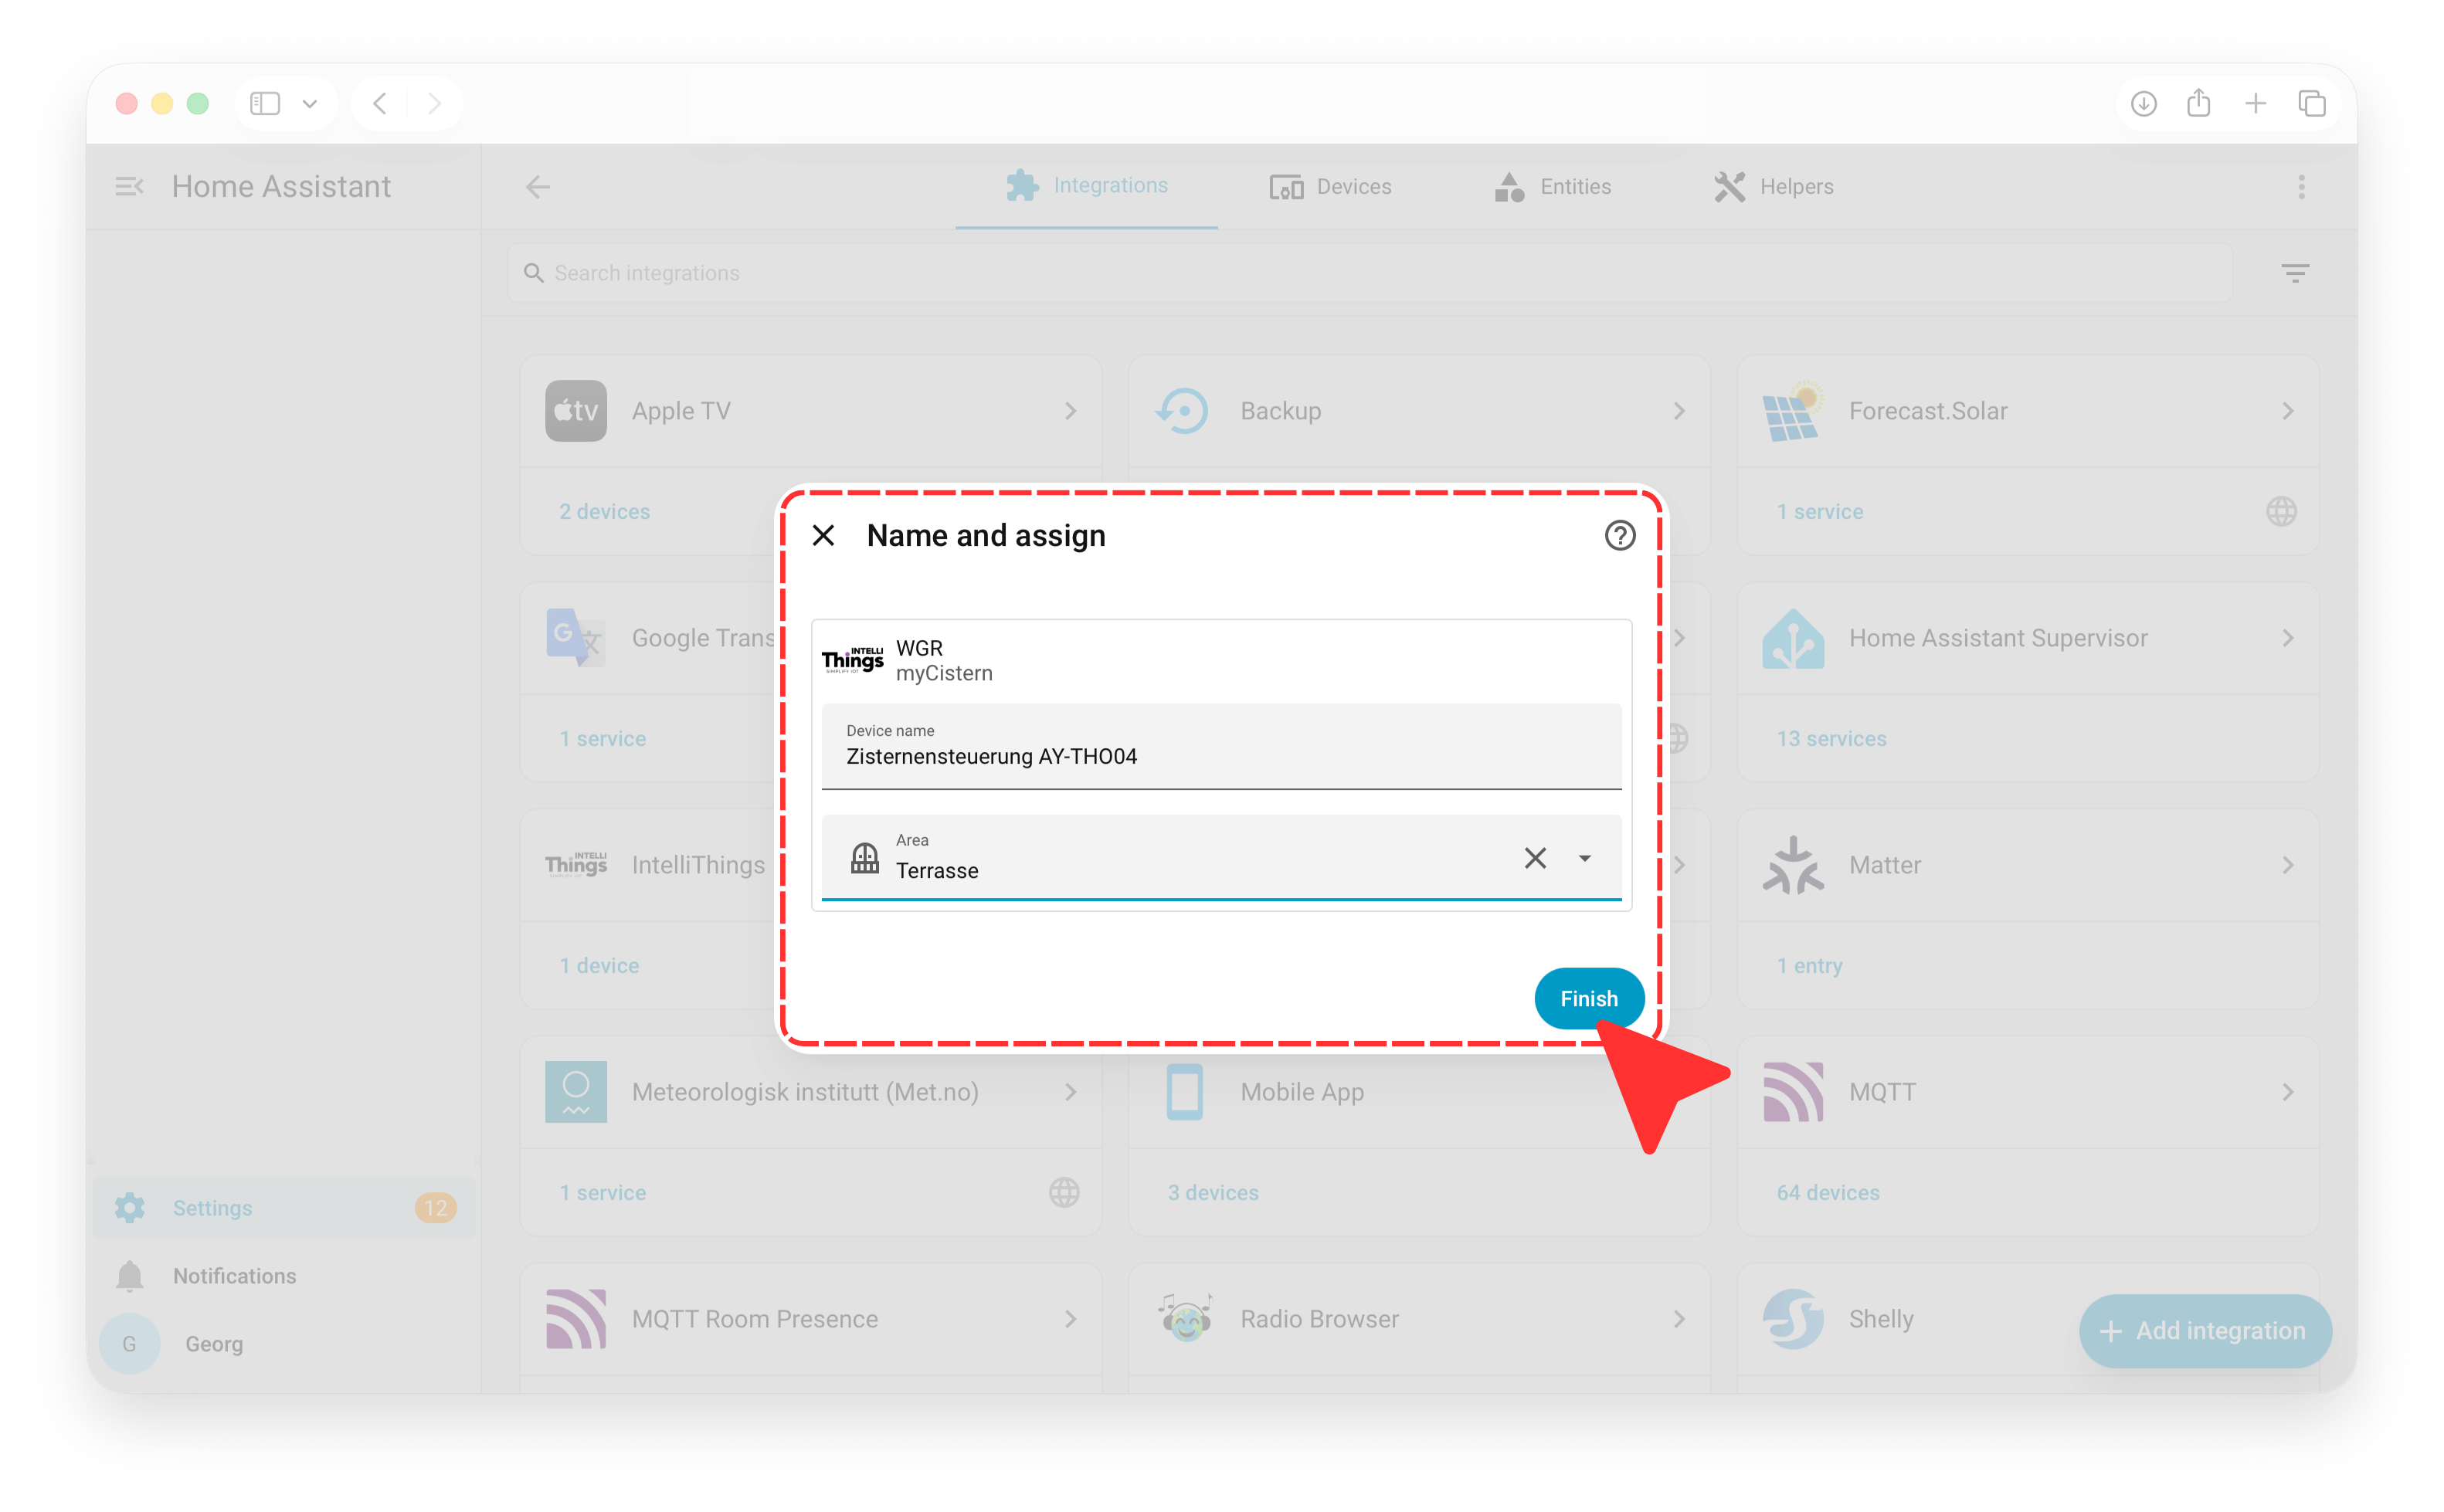
Review or change the device name. Assigning a Home Assistant Area is optional and depends on your setup. The example shows Terrasse, but you can choose any area or leave it unassigned. Click Finish.
Setup complete
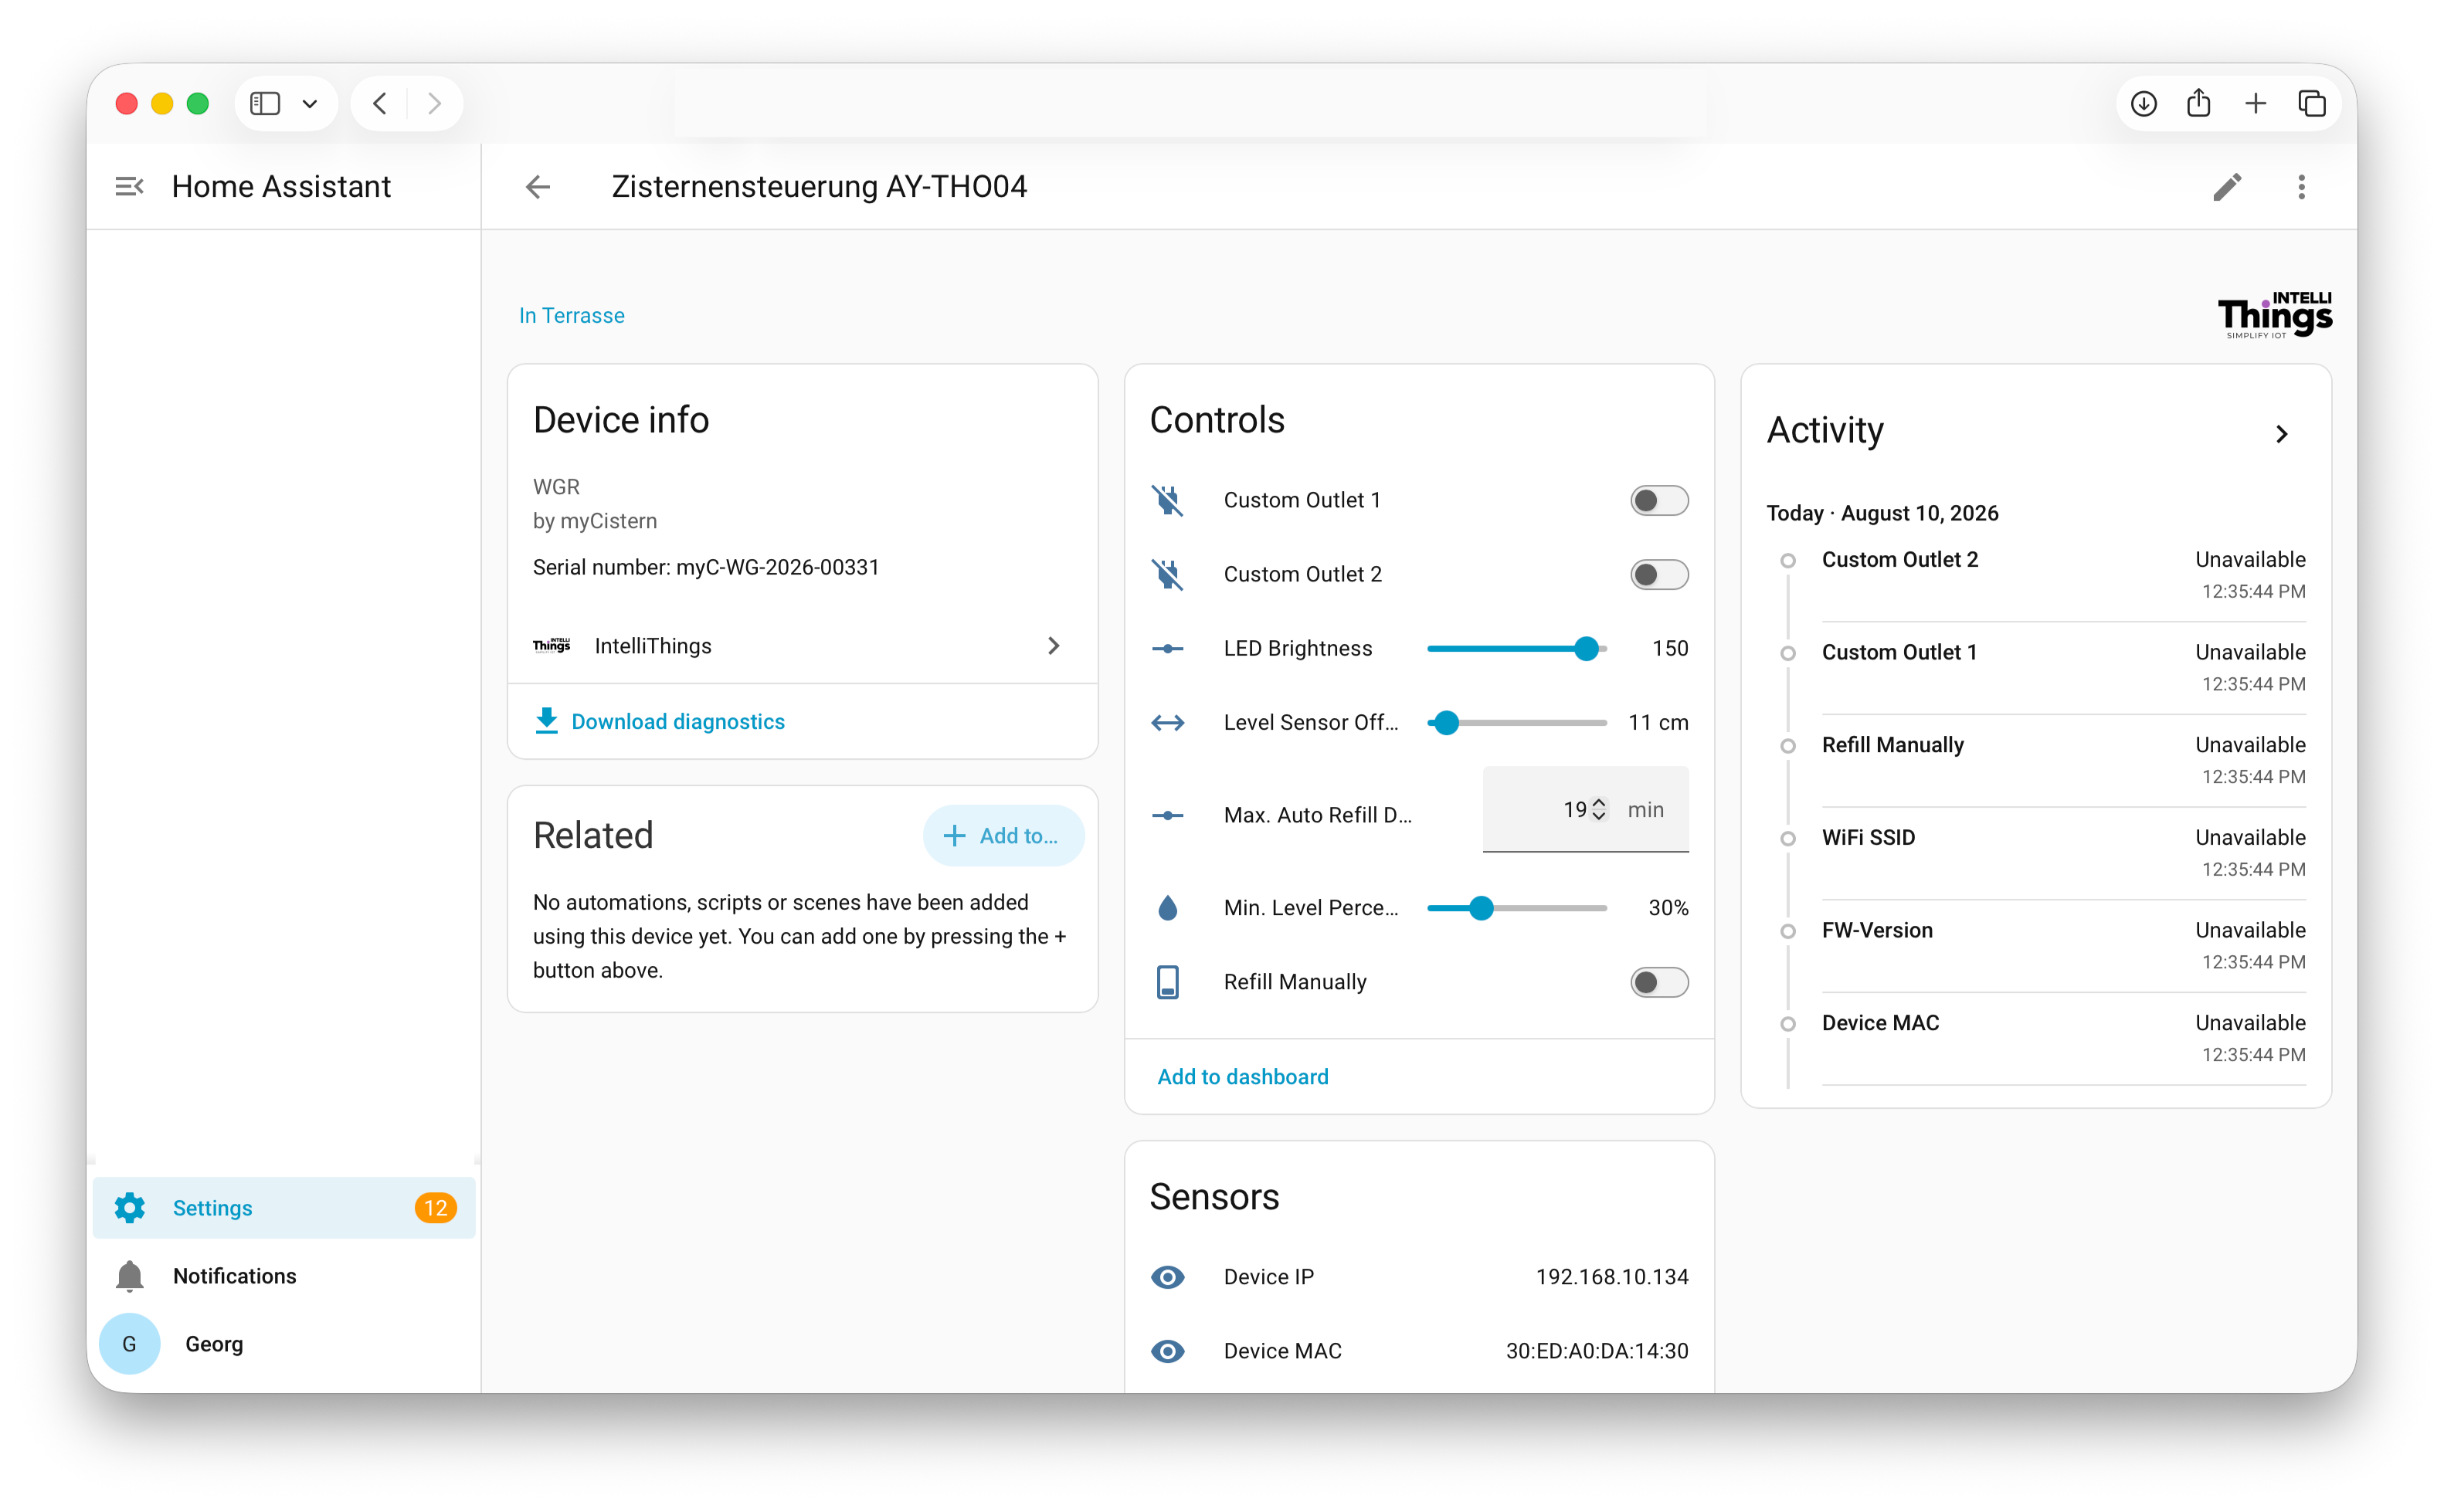
Your myCistern device is now available in Home Assistant. It exposes device information, entities, sensors, values, and controls according to the device and its template. The exact entities can vary by device configuration.
Available entities
The integration provides the following entities. A check mark means that the entity is available for the respective model.
| Entity | Type | WaterGuard Level | WaterGuard Refill |
|---|---|---|---|
| Wi-Fi RSSI | Sensor | ✓ | ✓ |
| Wi-Fi SSID | Sensor | ✓ | ✓ |
| Device IP address | Sensor | ✓ | ✓ |
| Device MAC address | Sensor | ✓ | ✓ |
| Currently installed firmware | Sensor | ✓ | ✓ |
| Error code | Sensor | ✓ | ✓ |
| Level as volume | Sensor | ✓ | ✓ |
| Level as percentage | Sensor | ✓ | ✓ |
| Level as water height | Sensor | ✓ | ✓ |
| Level sensor offset | Control (Number) | ✓ | ✓ |
| Current LED brightness | Control (Number) | ✓ | ✓ |
| Current filter state | Sensor | ✓ | ✓ |
| Current switching state of output 1 | Binary Sensor | ✓ | |
| Current switching state of output 2 | Binary Sensor | ✓ | |
| Current refill-unit state | Sensor | ✓ | |
| Manual refill | Switch | ✓ | |
| Minimum level in percent | Control (Number) | ✓ | |
| Maximum refill duration | Control (Number) | ✓ | |
| Cloud-controlled workflow state 1 | Switch | ✓ | |
| Cloud-controlled workflow state 2 | Switch | ✓ |
What this integration enables
Your myCistern device is now available in Home Assistant through the intelliThings integration. You can use its entities in dashboards and automations or combine them with other devices in your Home Assistant setup.
Data synchronization works in two directions:
- intelliThings → Home Assistant: Incoming data is synchronized every 10 seconds.
- Home Assistant → intelliThings: Changes made through writable controls, such as switches, configurable values, and setpoints, are sent to intelliThings immediately after the change.